Secure Boot and HVCI enable
I have these two errors
Solution:Jump to solution
Solution:- change disk partition to GPT, change bios mode to UEFI, then enable secure boot from the bios.
93 Replies
I went to to BIOS and made sure it’s turned on and watch videos but i got same error

never had these errors before until new patch
I fixed HVCI
Only secure boot
no clue
;secureboot
Vanguard constantly crashing? Secure boot not enabled?
These steps should help with Secure Boot and TPM errors:
Before we start, please try uninstalling Vanguard, VALORANT, then Riot Games, and reinstall.
Alternatively, search for "TPM reset in Windows." If that doesn't work: Copy and paste this into CMD (Run as admin): IMPORTANT: Depending on your specific motherboard vendor, the setting location may vary. Look for:
- TPM
- Security Device Support
- PTT
- FTPM
- Intel Platform Trust Technology
These are usually located within CPU Configuration, Security, or Trusted Computing. Make sure these are enabled, along with TPM State. (You may need to select TPM 2.0. AMD users might need to enable NX Mode.) Set Secure Boot Mode to Standard. If after rebooting, Windows still shows Secure Boot as disabled, set Secure Boot Mode to Custom.
Press F10 to save and exit. If this doesn't work: Update your BIOS (you’ll need a USB for this). 1. Type "System Info" into Windows Search, and look for the BaseBoard Product - copy and paste it into Google.
2. Go to your motherboard’s support page and navigate to the Drivers/Downloads section. 3. Download the latest BIOS version. 4. Extract the download and place it onto your USB (make sure it’s FAT32). 5. Go to BIOS and paste this into CMD (Run as admin): Based on your motherboard vendor, follow these options: - MSI – MFLASH
- ASUS – EZ Flash Utility
- ASRock – Instant Flash
- Gigabyte – QFlash
Select the BIOS file and update. Your system may restart a few times. If this guide wasn’t detailed enough for your specific motherboard, search online for things like “How to update MSI BIOS” or “How to turn TPM on for MSI” for more detailed instructions. -# These solutions have been provided by COMPREADY:cr:.
Open disk management
Show ss

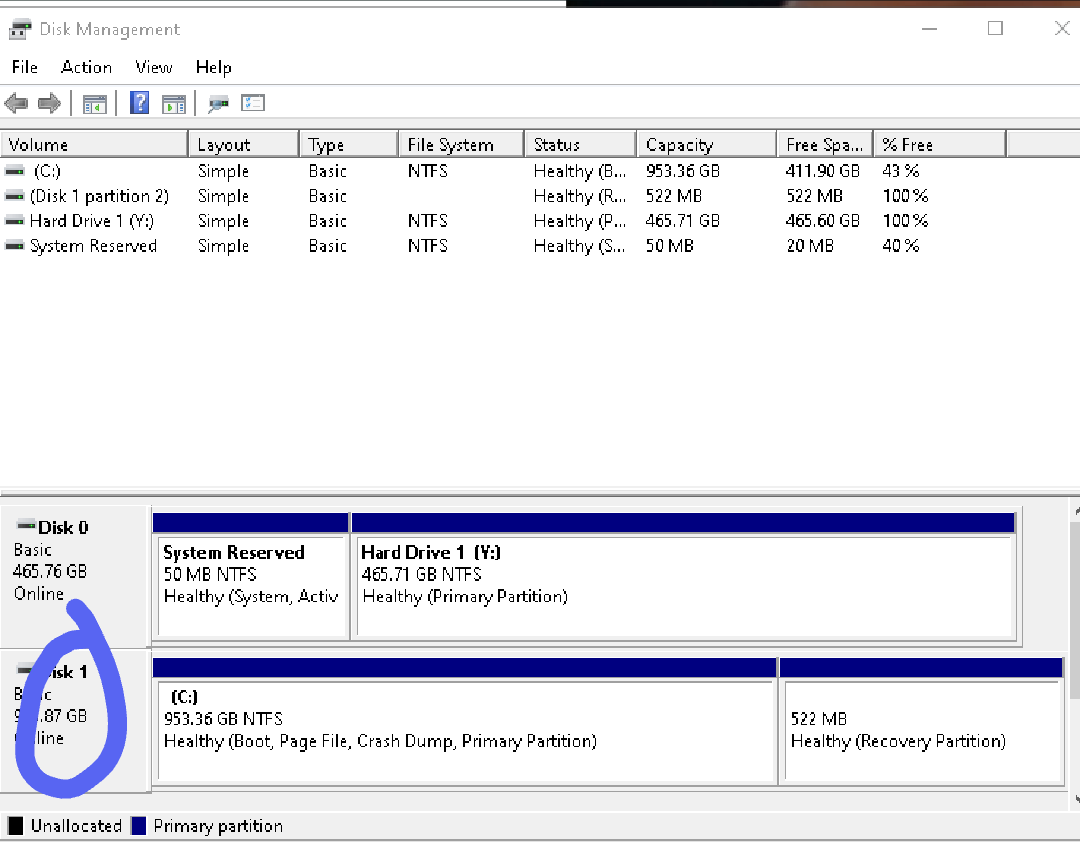
Right click on disk 0
1*
Properties
Volume
Show ss
i tried that already
idek in bios it says enabled but on my specs screen it says
Secure boot state unsupported
U tried what?
^ kindly.

Ok
Here is the thing
What we are about to do has a very very small chance of fcking up the windows boot manager
Its usually not an issue with newer motherboards like urs
But it is recommended to have a usb with a windows installation on it
In case things go south
:val_Hampter:
Again, the chances of things going south are very very low so its not necessary but it is recommended
For the cases it has happened, 2 times with like 10 year old motherboards
Never with a newer one
:Iso_Sip:
Jidat is a trusted user within the community help channel and his track record is flawless.
:catsmile:
I will let u think till i get my lazy ass outta the bed
what is the procedure
:ShrekLooking:
Shouldn't take more than 10 minutes
Doing 2 commands in cmd and hopefully they work in the first try
Then getting into the bios and changing the bios mode to UEFI
Then enabling secure boot in the bios
Which is also not mentioned in this message that the bios mode needs to be uefi (told cal that a few weeks ago too)
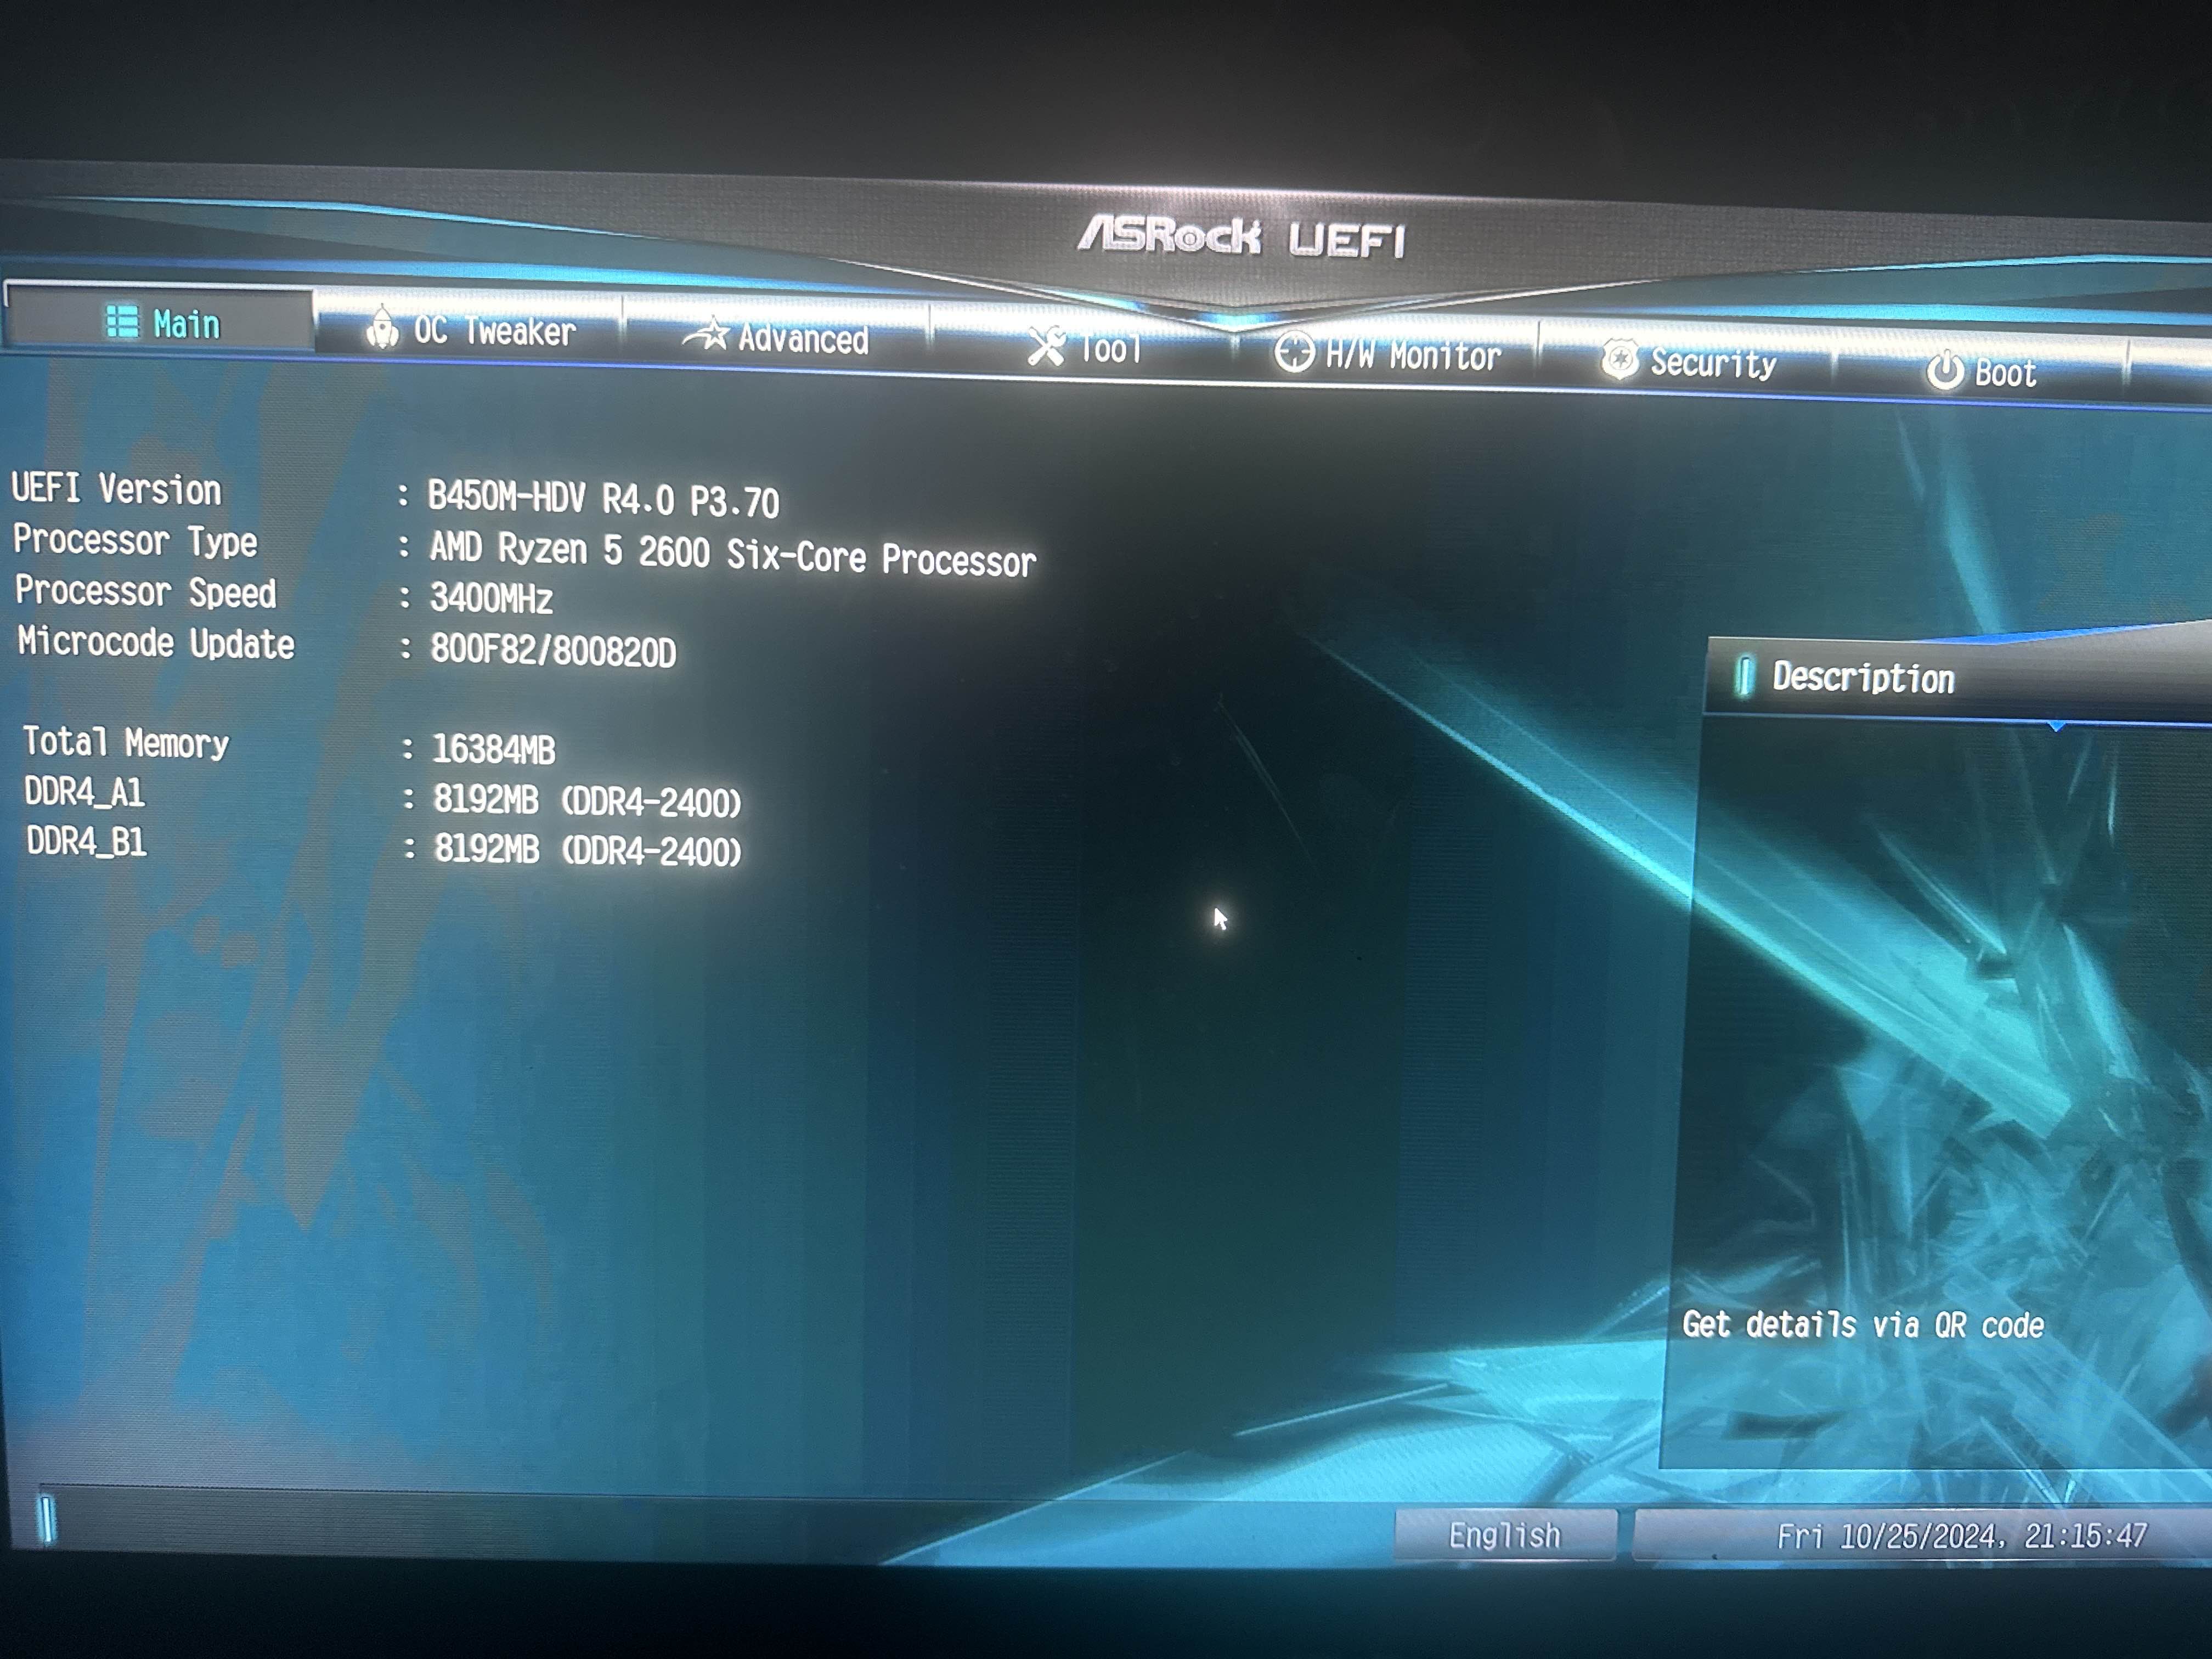
Is this bios mode already in uefi
well yea im open to whatever now
Go to boot
Show photo
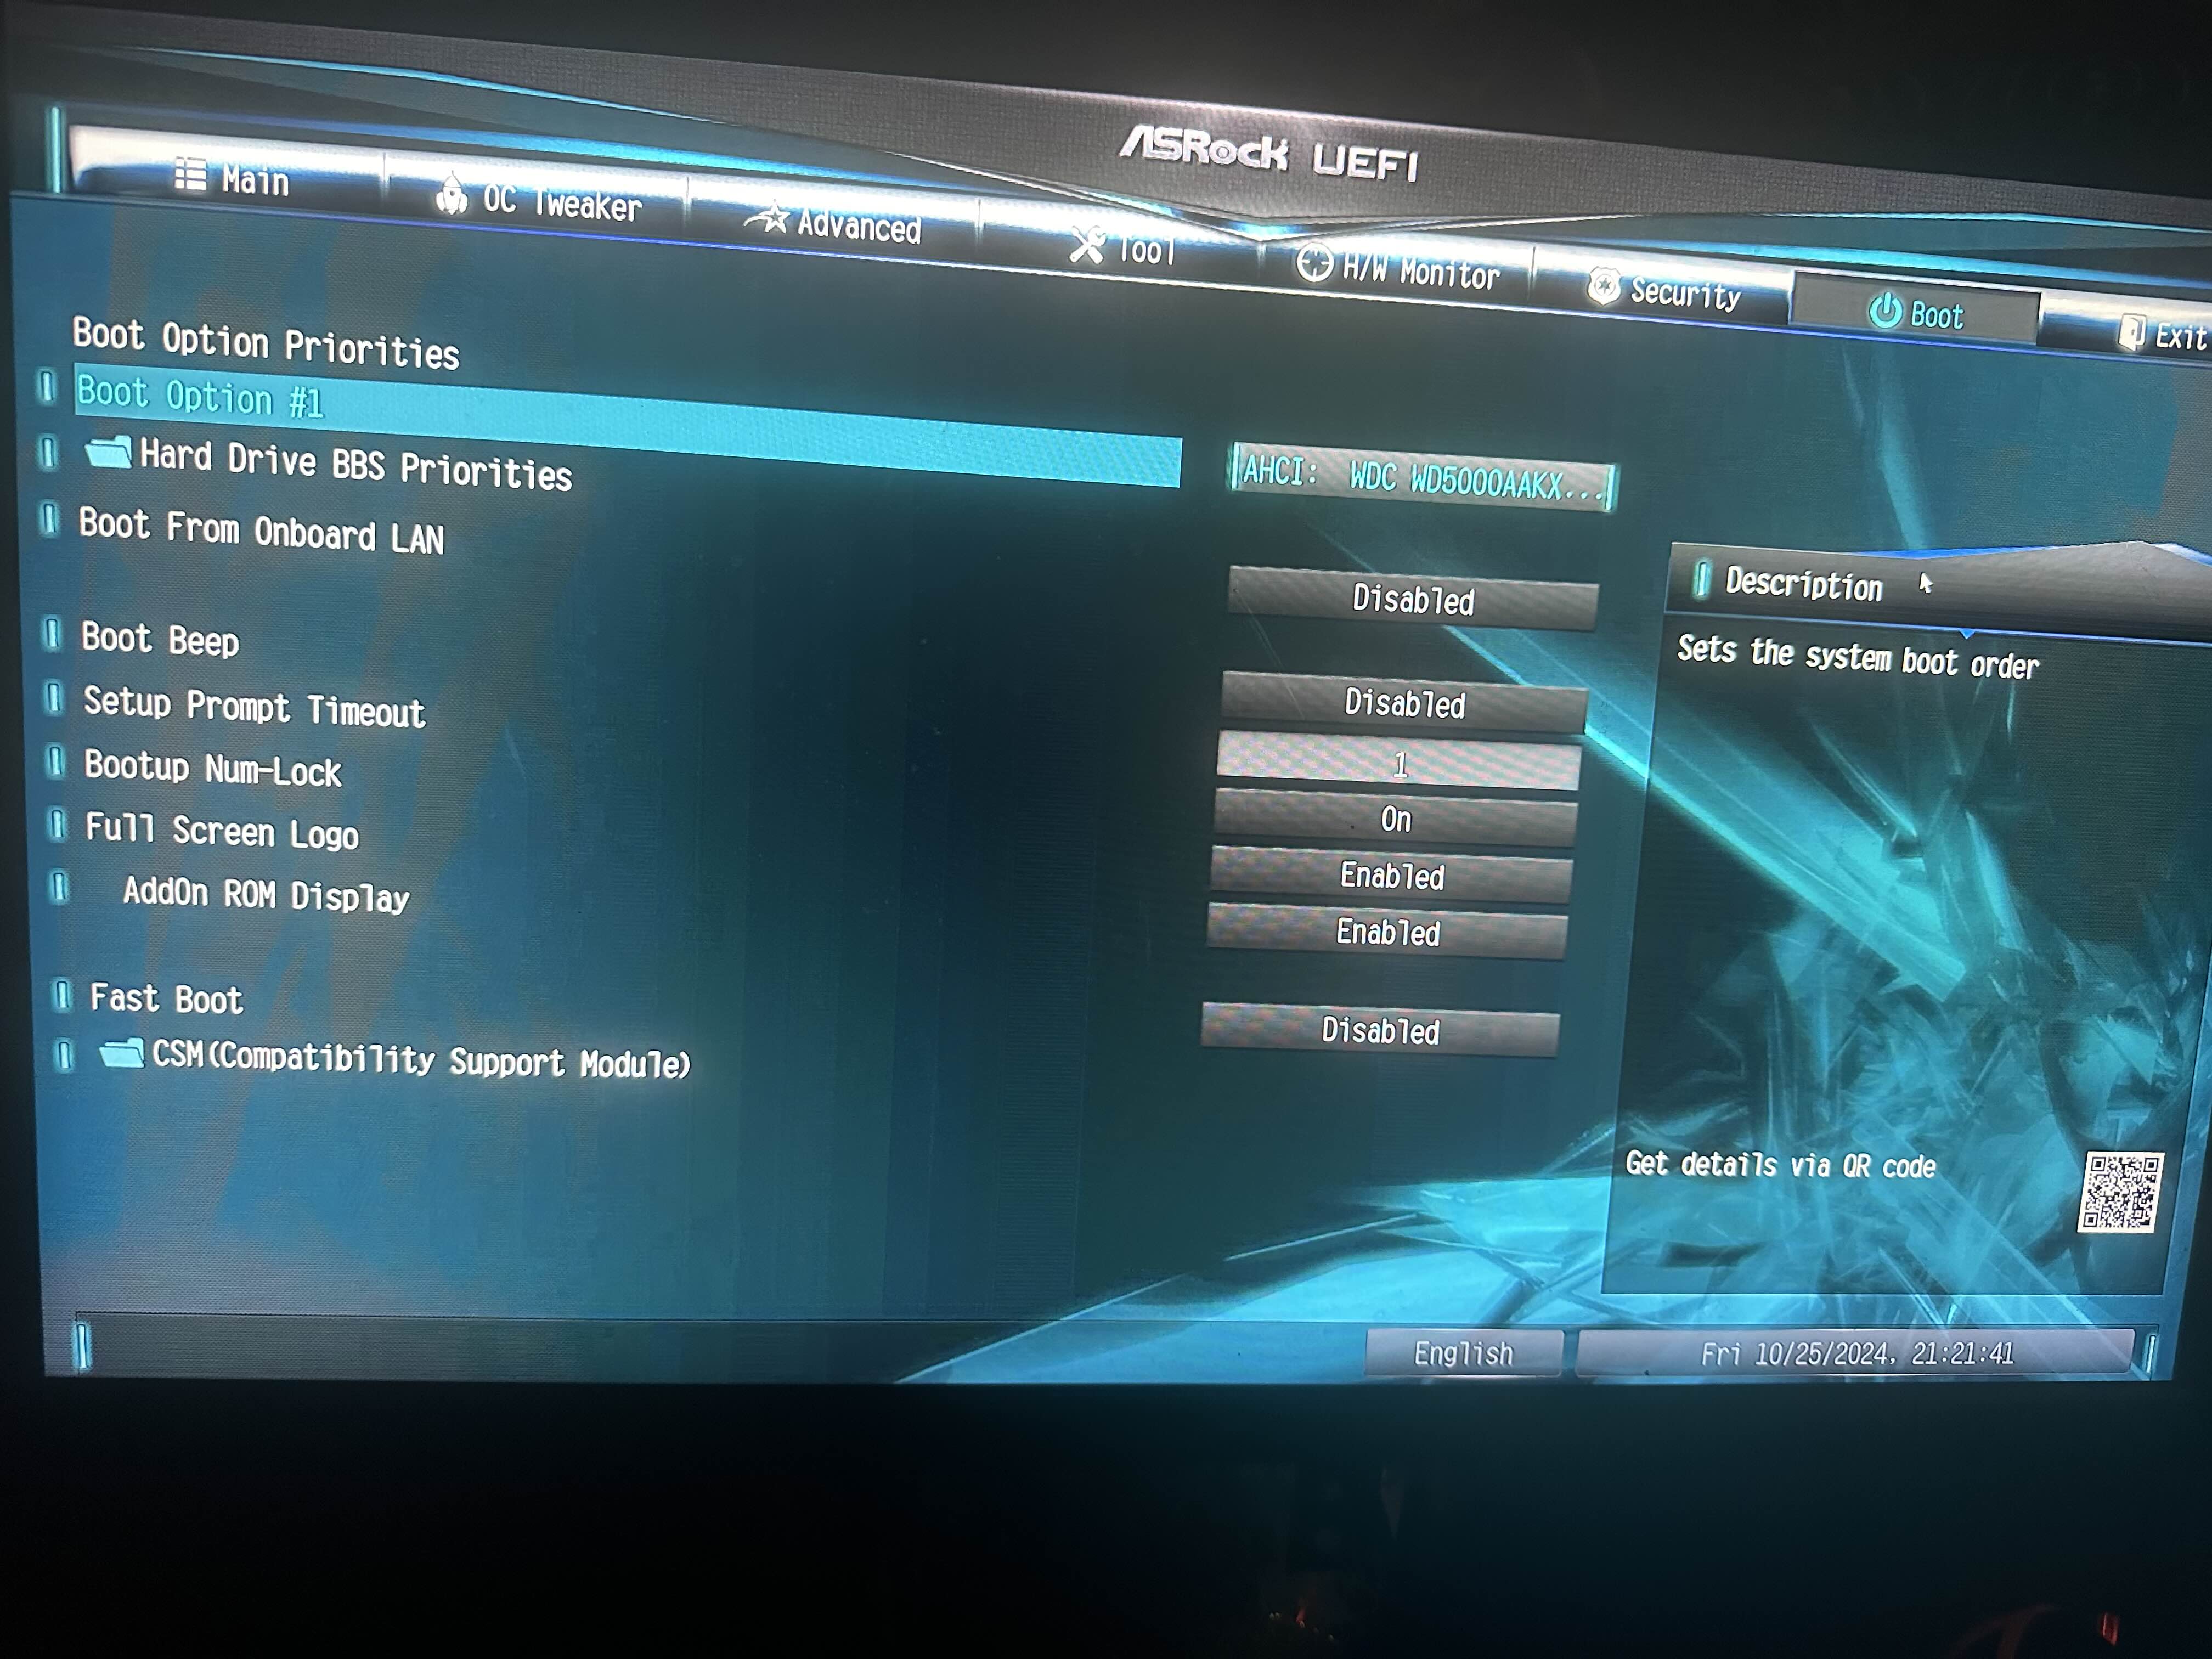
CSM
At the bottom
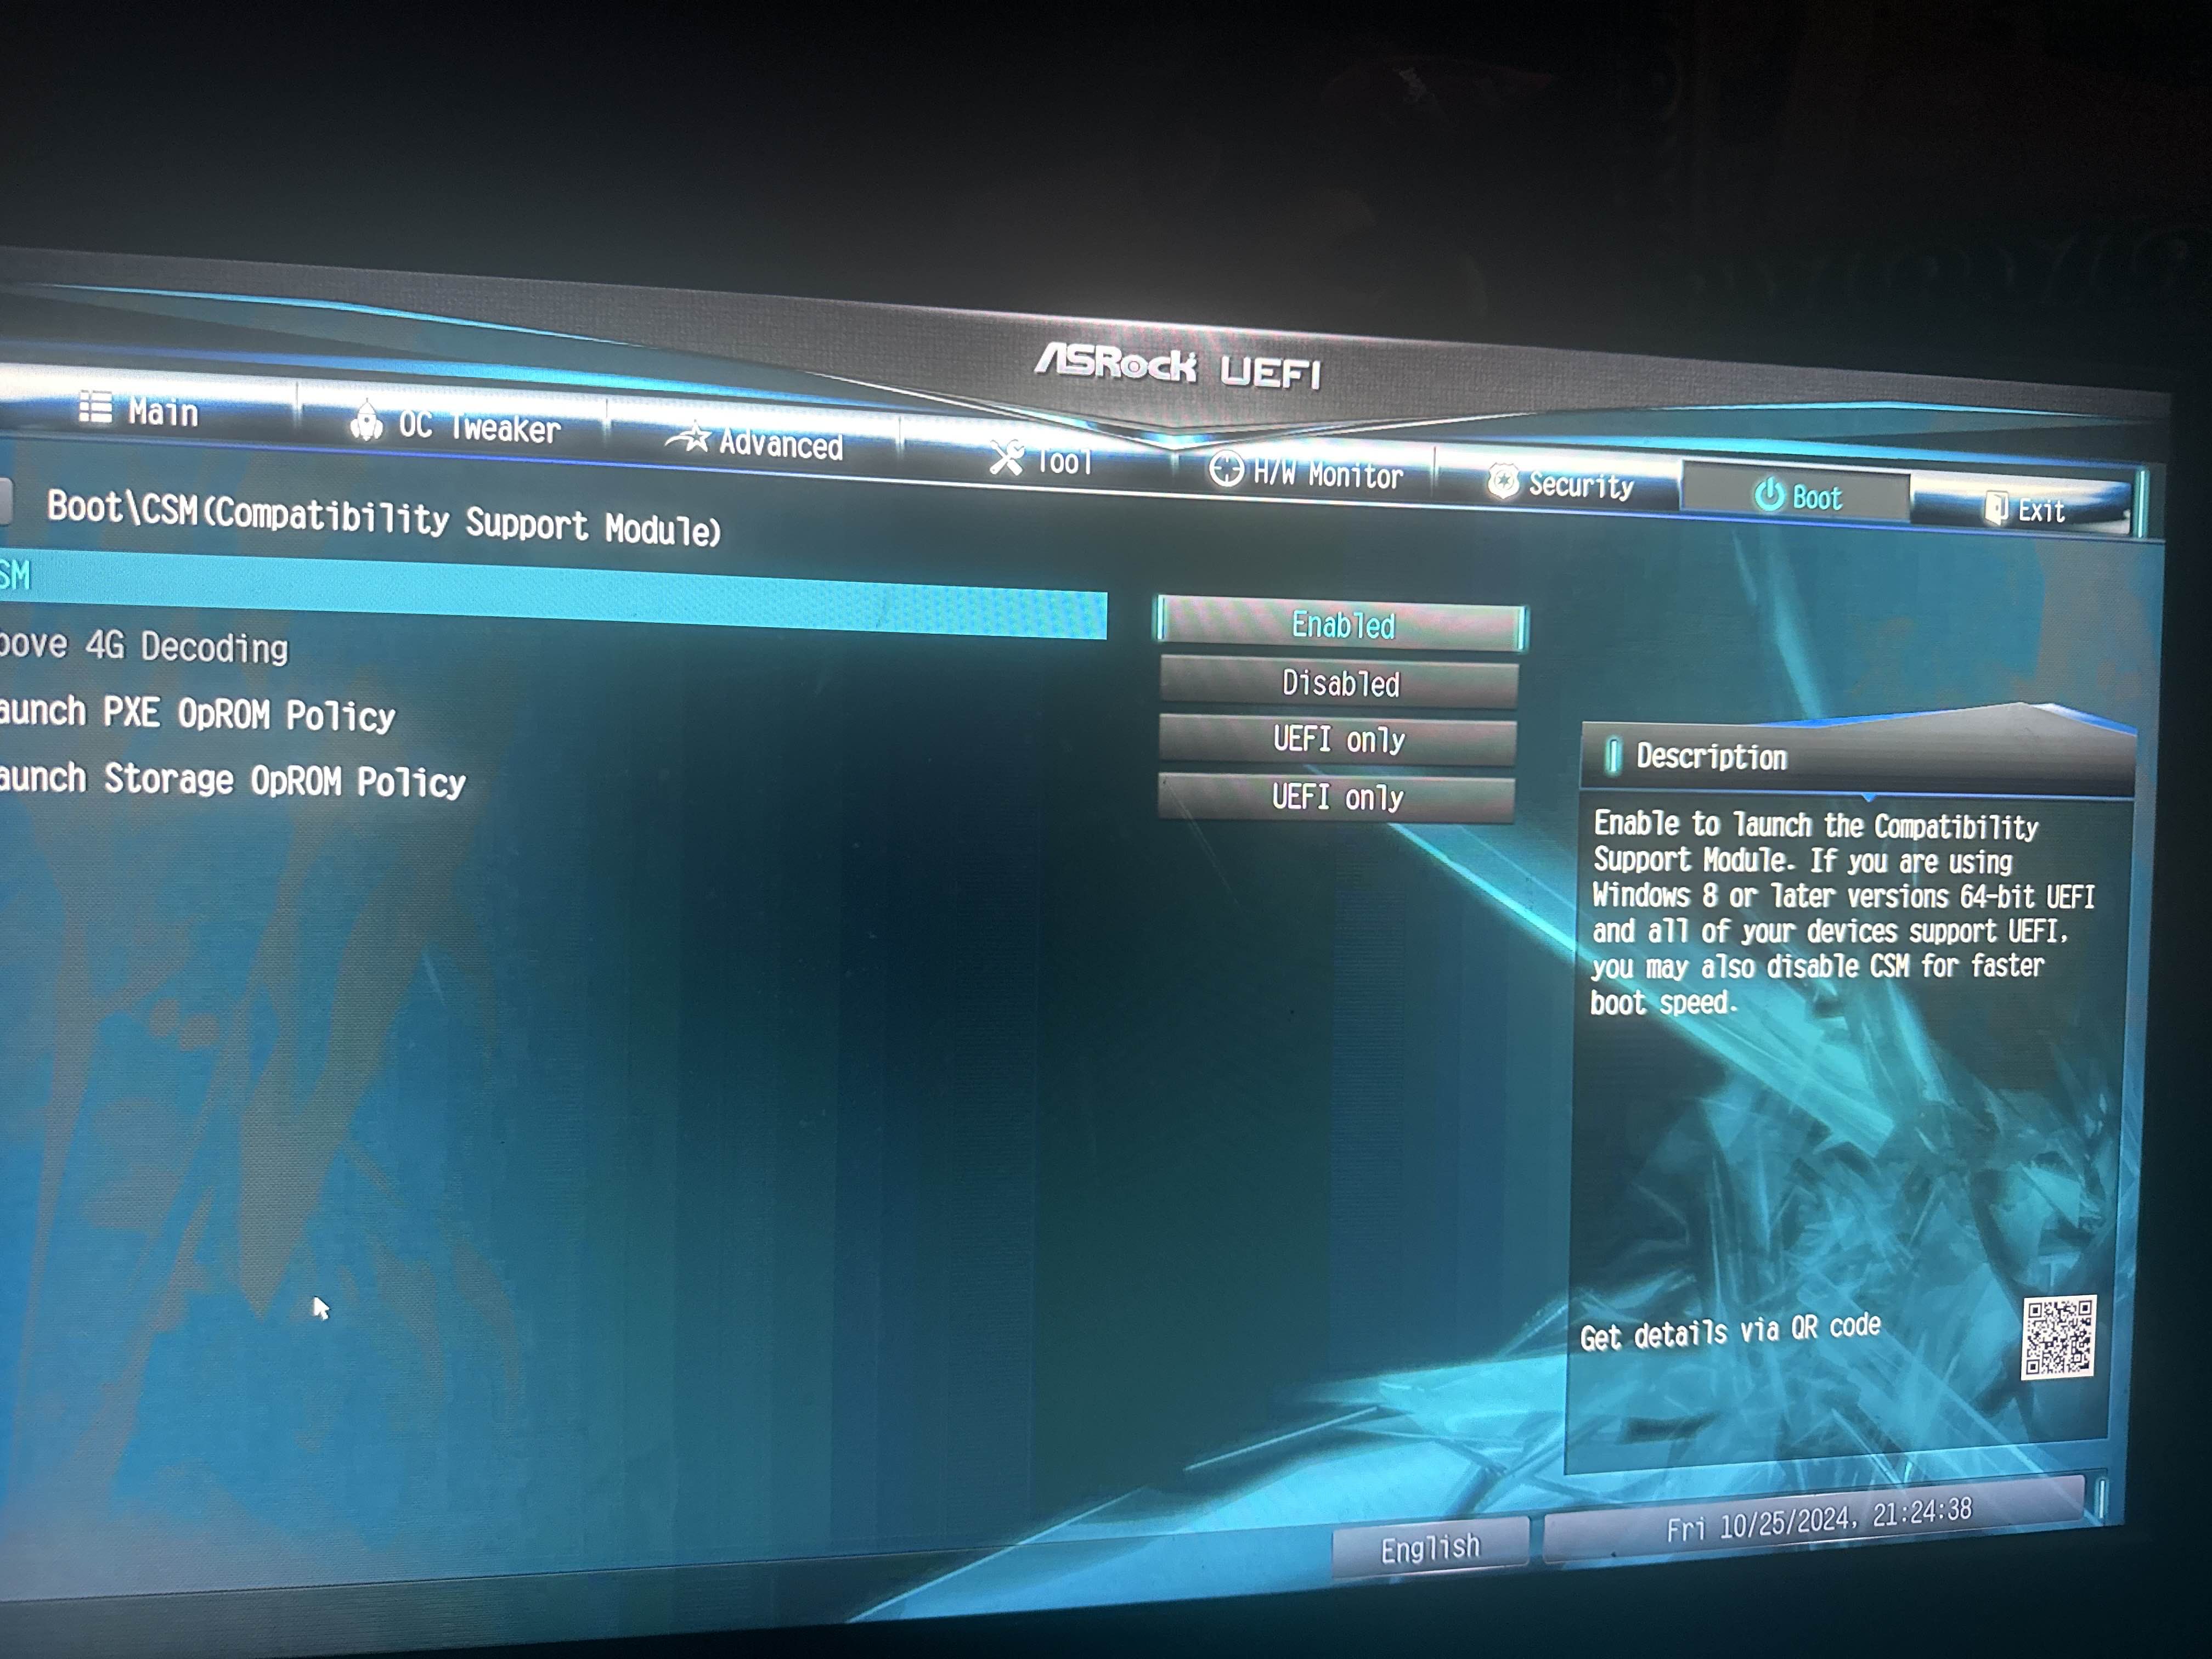
Yep the bios is in legacy mode
Get out of the bios
Don't do anything with csm for now
okay
:catsmile:
Open cmd as admin
Type this command and show result
mbr2gpt.exe /validate /disk:1 /allowFullOS

Welp
Close cmd
Open cmd as admin again
Type
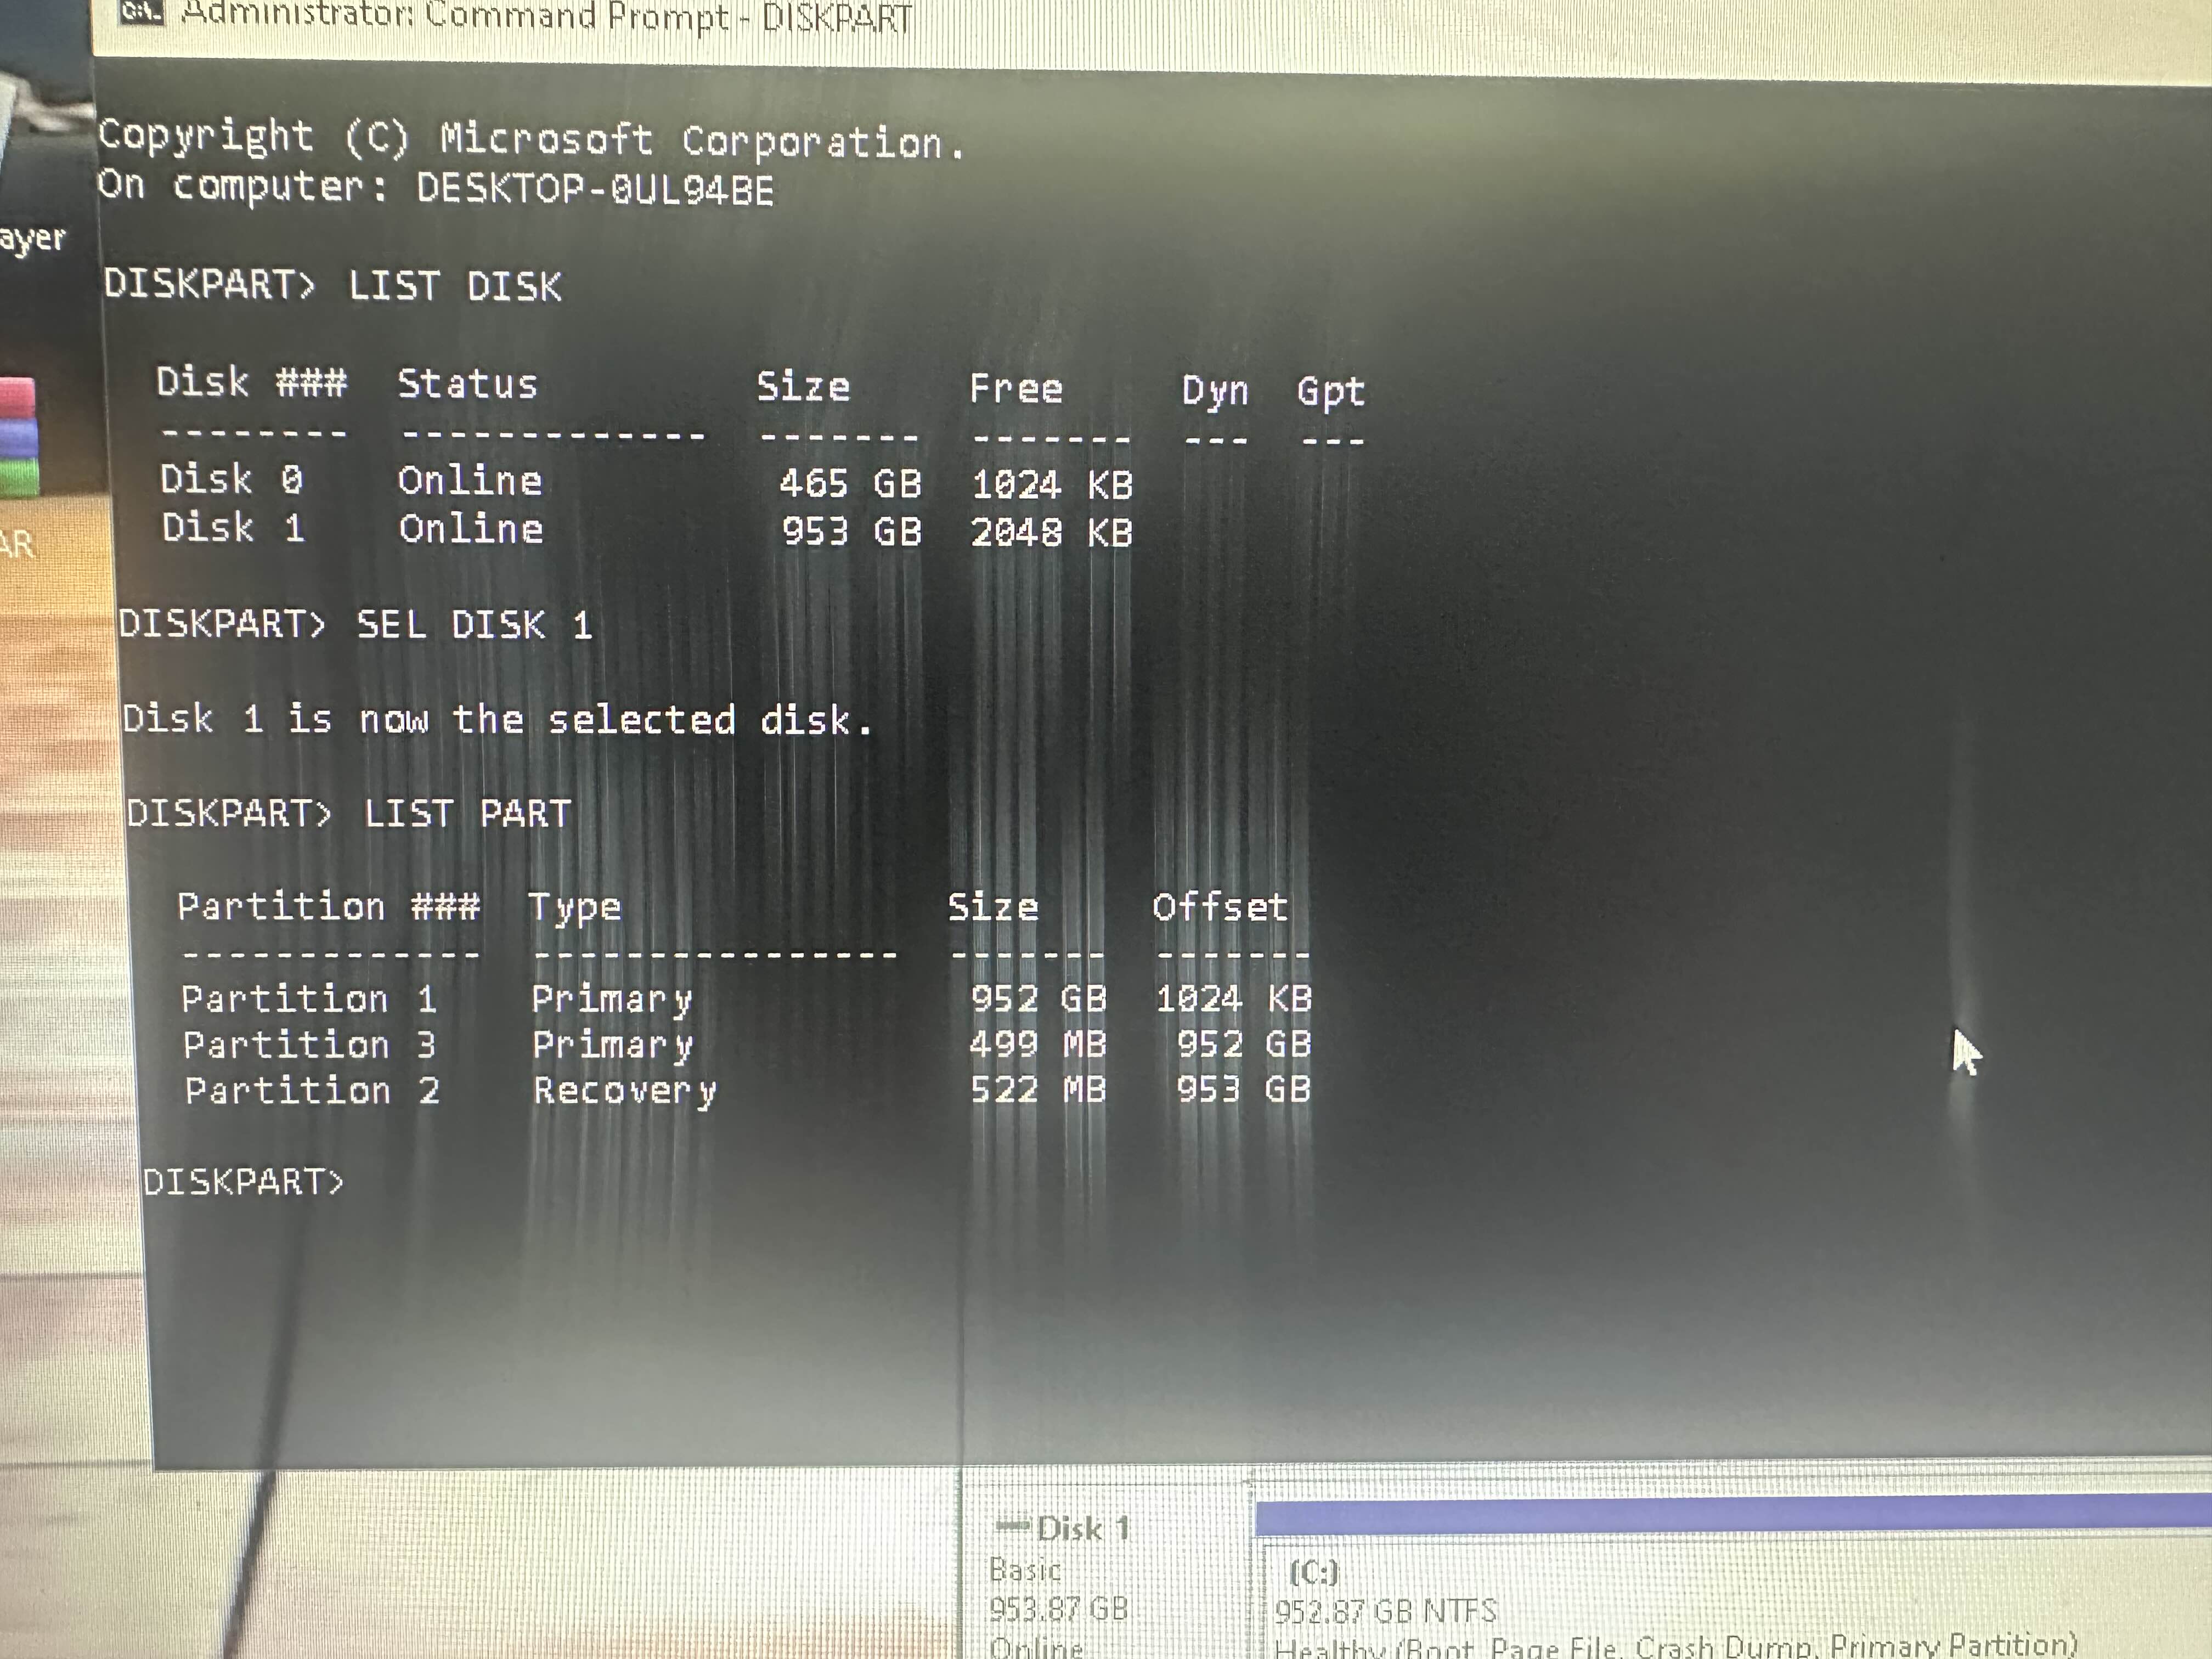
DISKPART
Then type LIST DISK
Show ss

Type SEL DISK 1
Then LIST PART
Show ss

Type LIST VOL
Show ss

Type SEL VOL 2
Then type SHRINK DESIRED=500
Show ss

Type EXIT
^ type this command again
Show ss

Ugh
Close cmd
Open ur C drive
Open the windows folder
Look for setupact file
Open it
Scroll down to the very bottom
Show ss
setup?
nvm found it
its a document
Yea open it

K close it
Open disk management again
Fullscreen it
Show ss

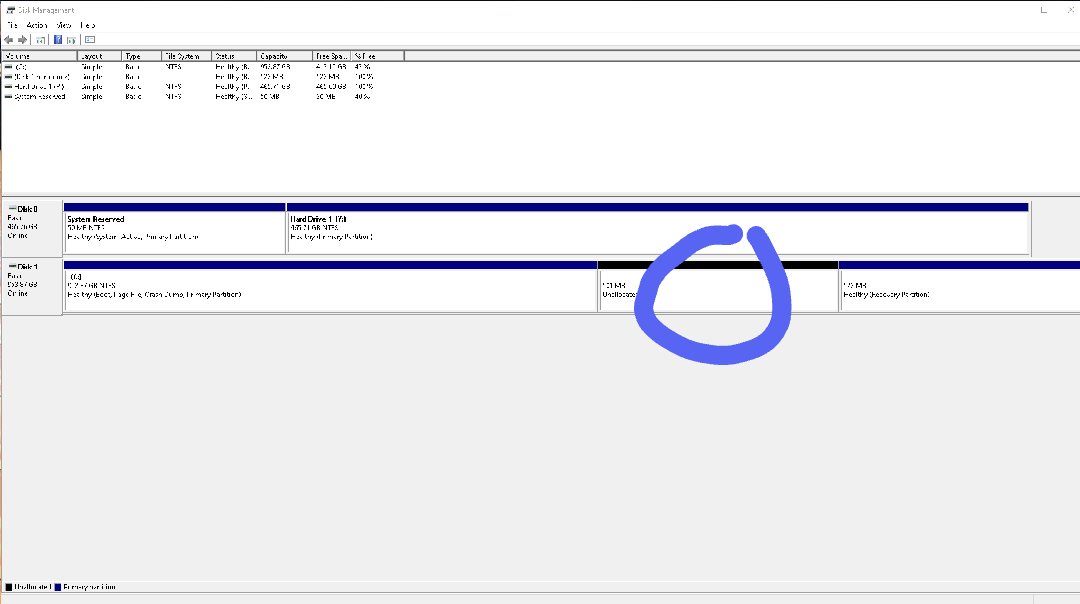
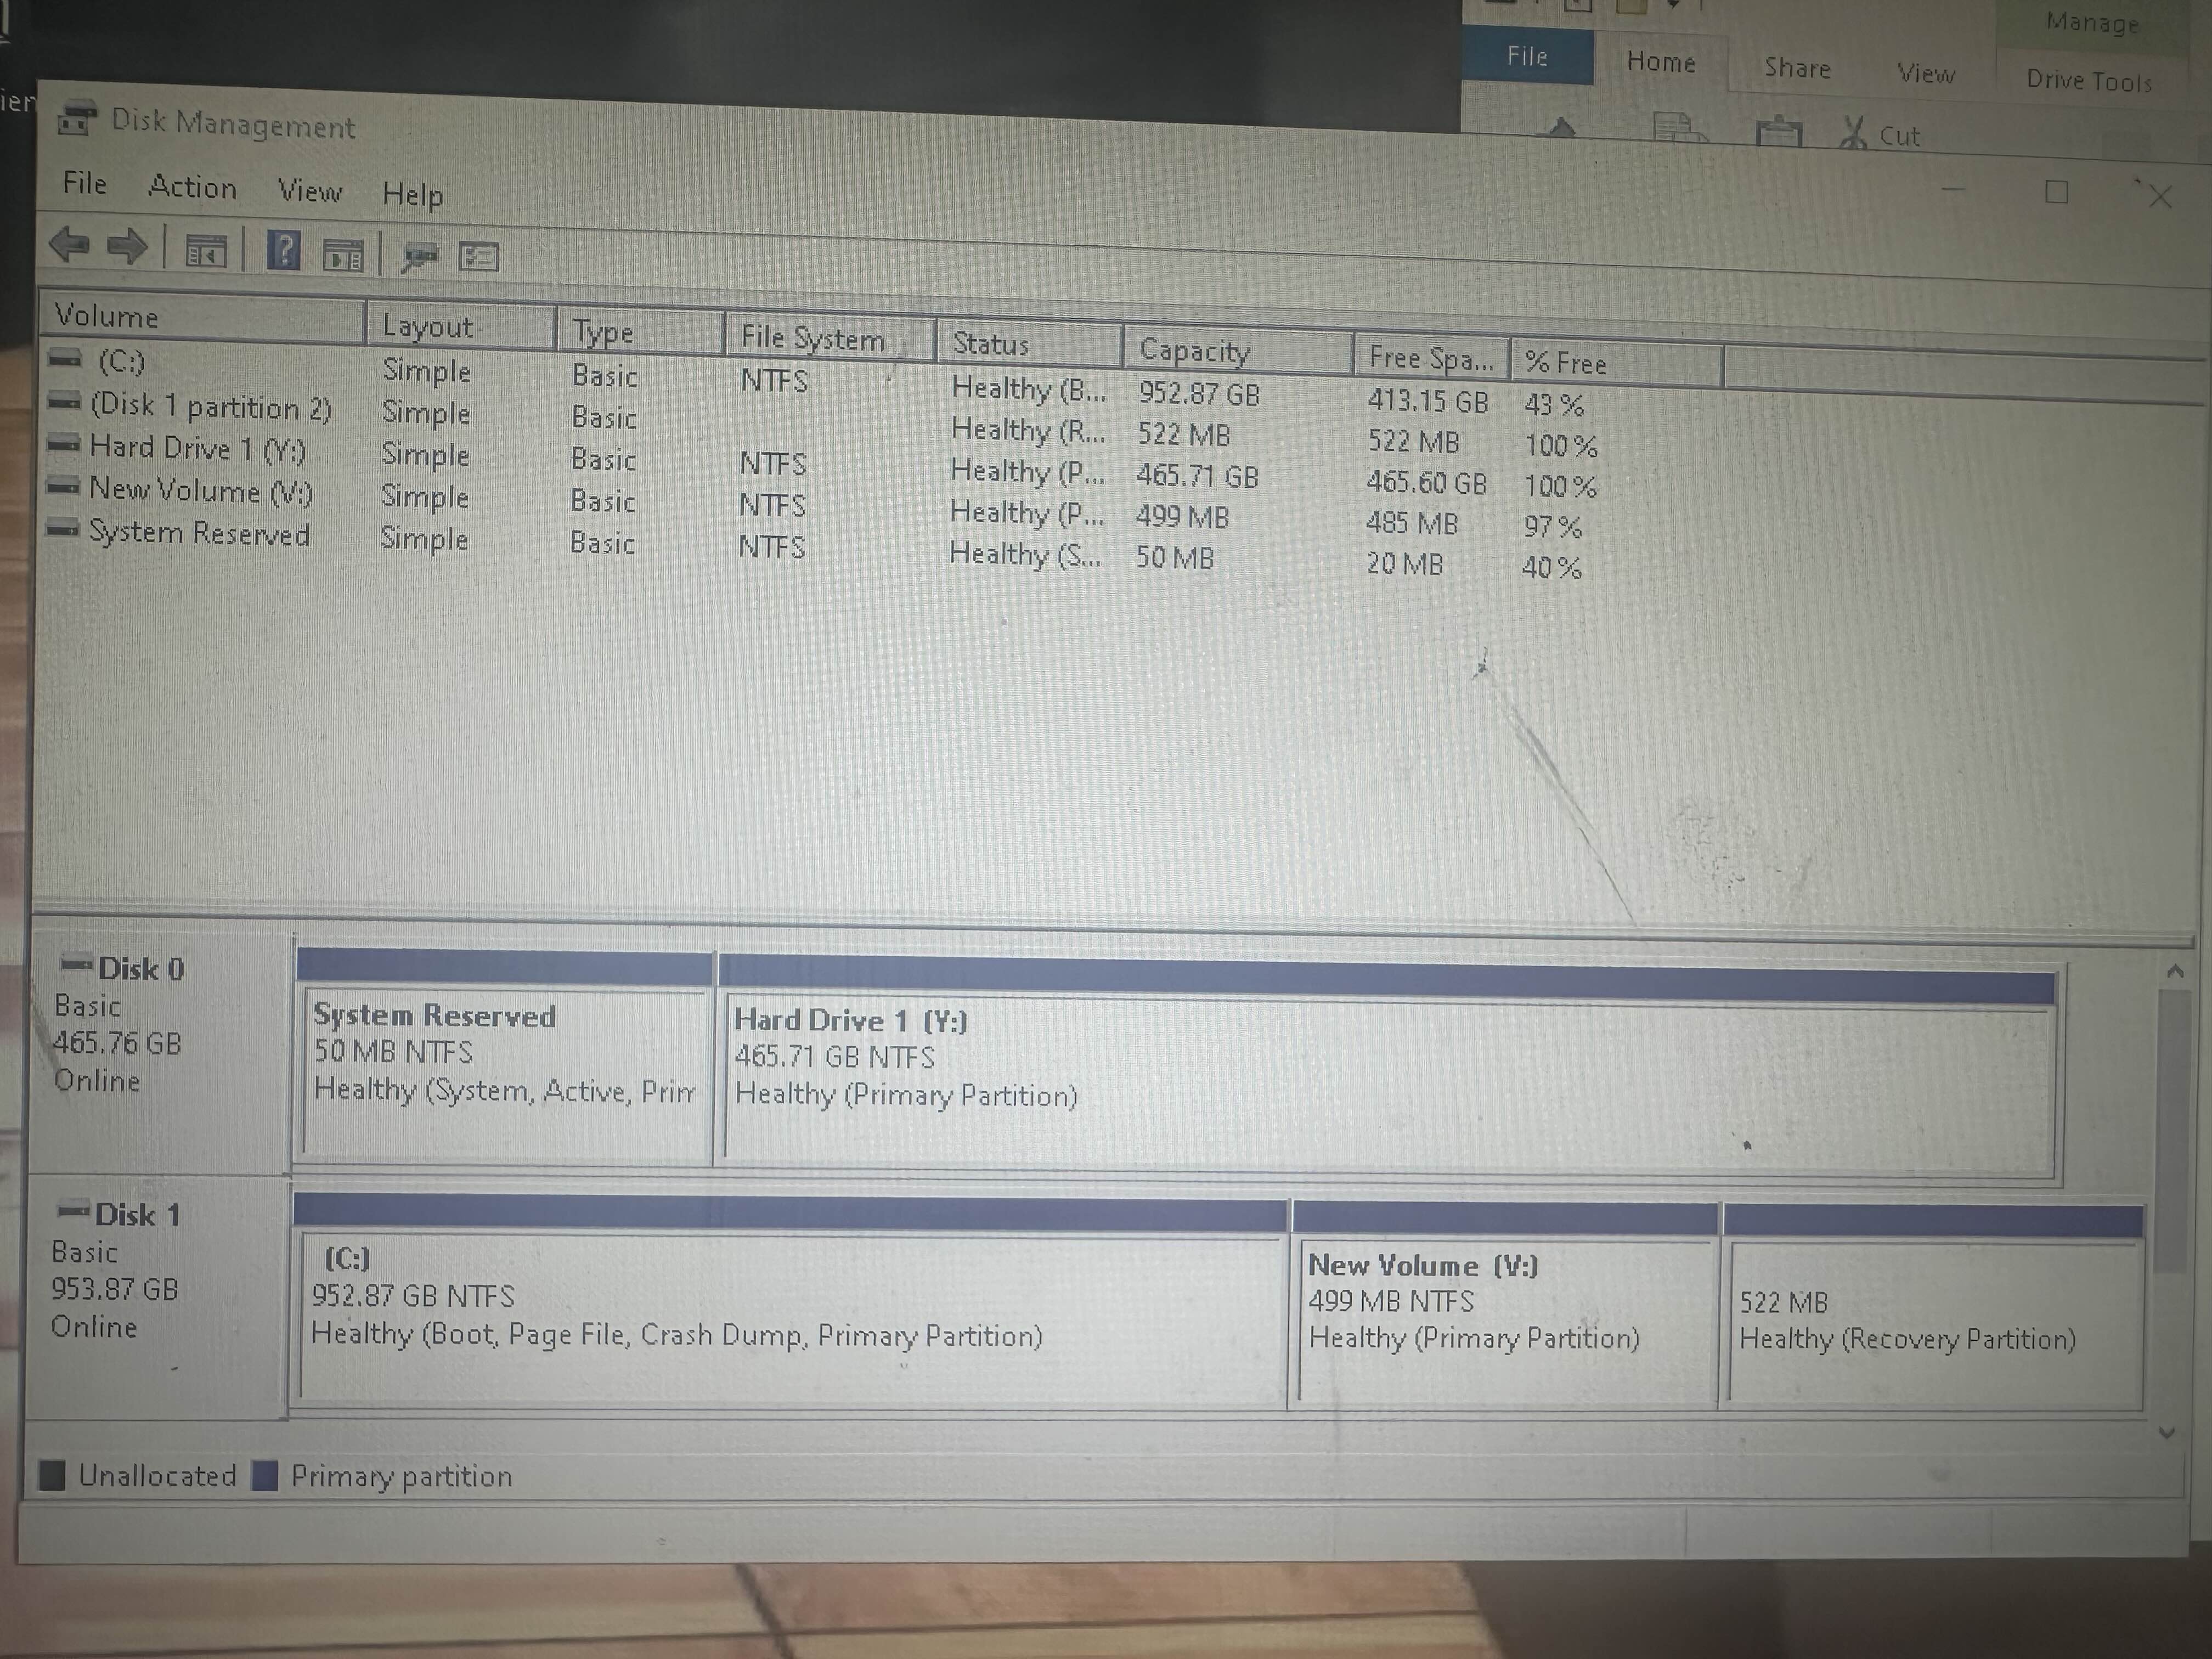
Right click on the unallocated space
New volume
Keep clicking next until it asks u to assign a letter
Assign the letter V to it
Then keep clicking next until its created
Show ss in disk management once done
Open cmd as admin again
Type these commands in order
DISKPART
LIST DISK
SEL DISK 1
LIST PART
Show photo
SEL PART 3
Then type ACTIVE
Then EXIT
✅
Then BCDBOOT C:\WINDOWS /F ALL /S V:
Show photo
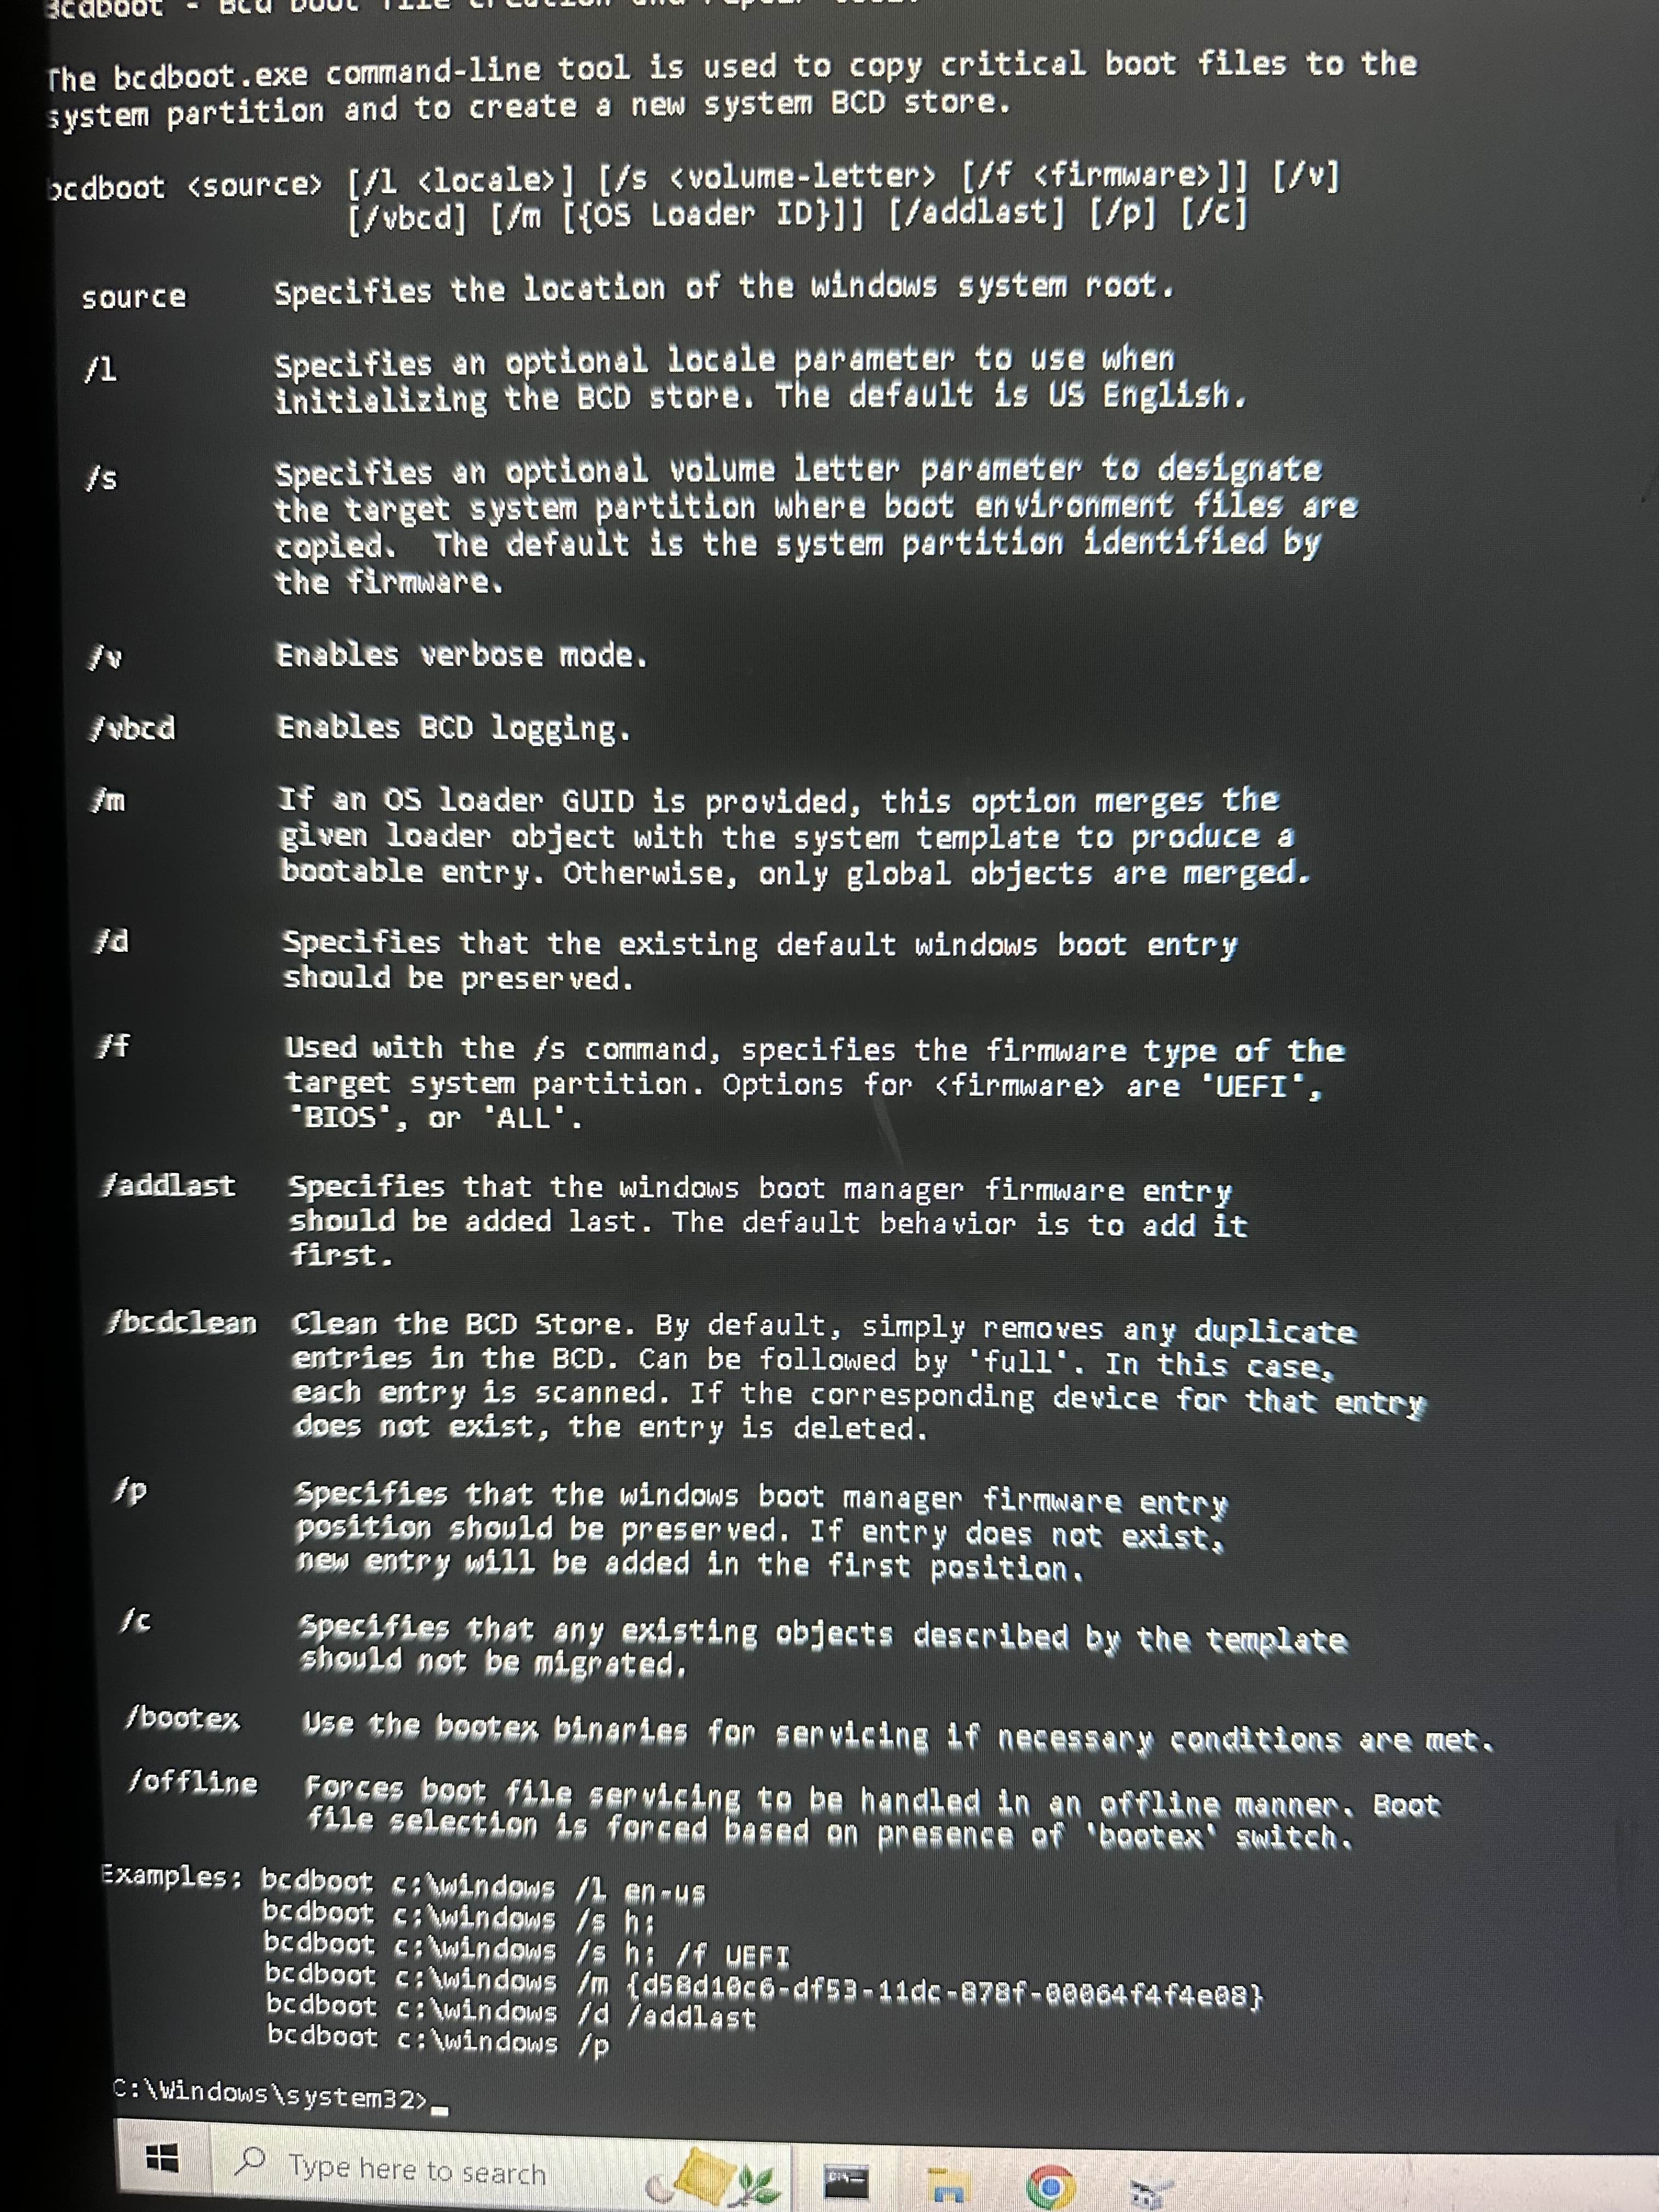
Show what u wrote
Probably i or u missed a space or did a typo
Redid it
Says boot files successfully created
^ do that command now
Show result
If it doesn't work then i am kinda donezo
@isaac u there?
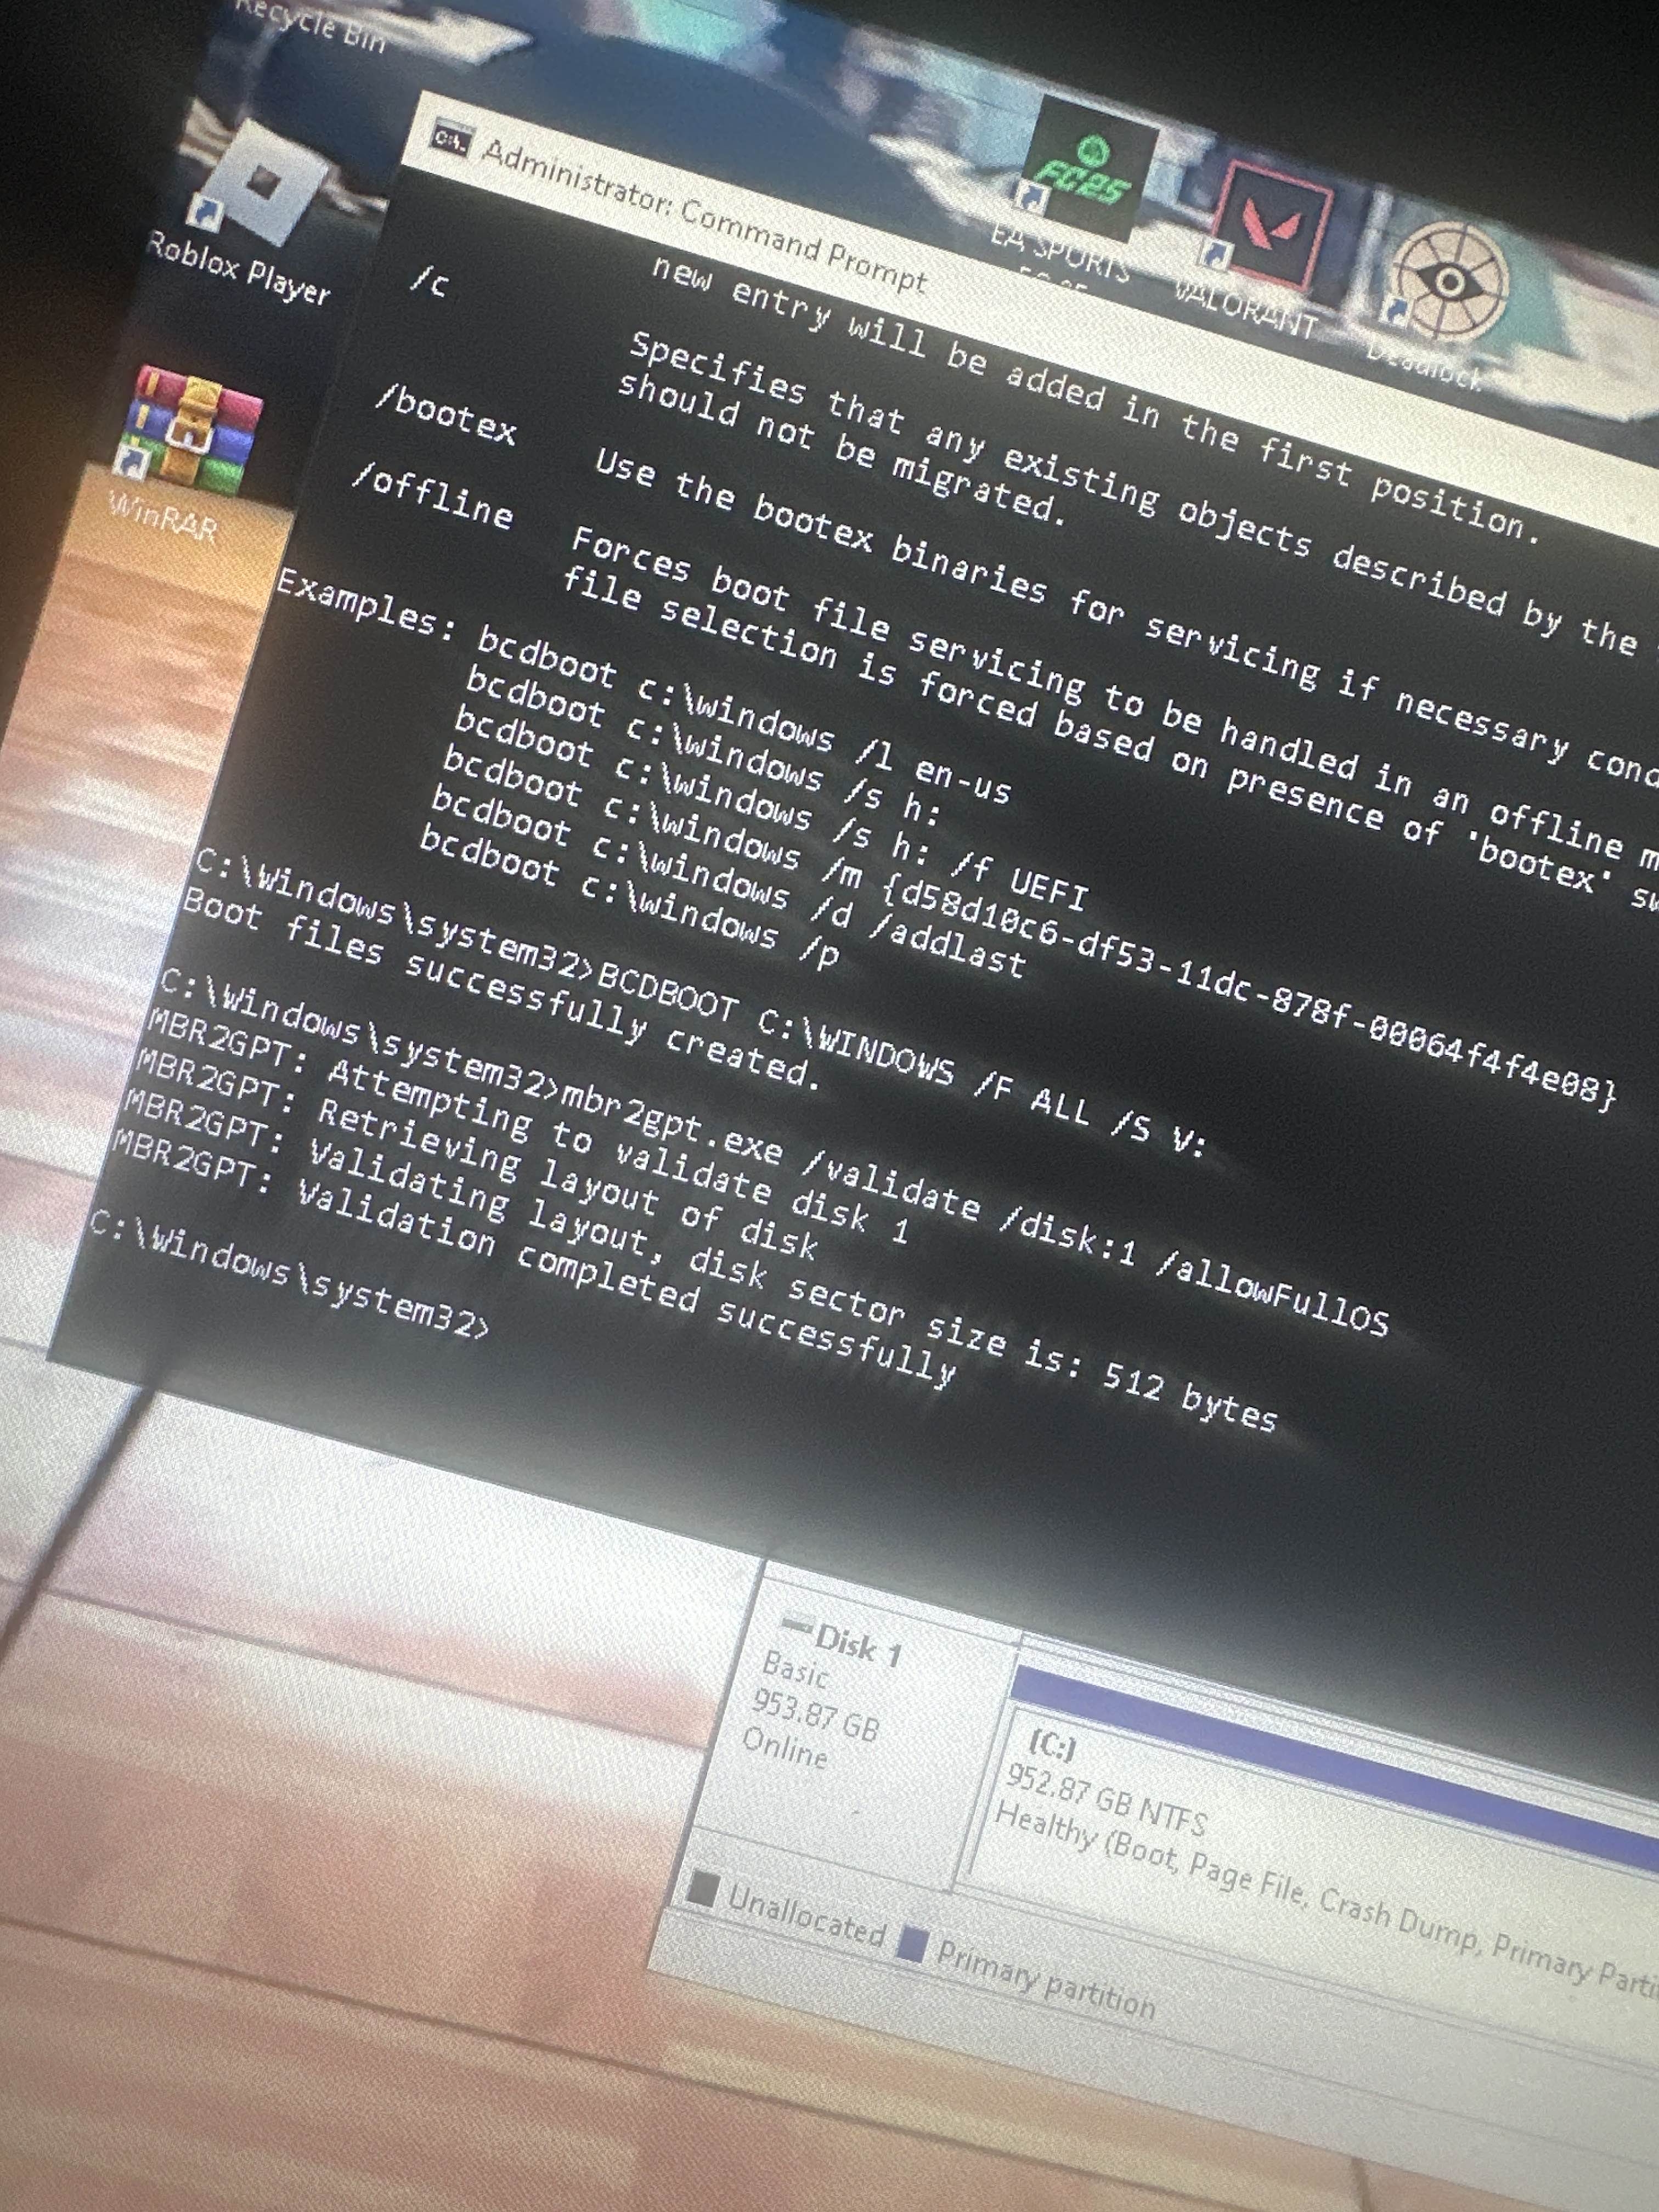
Finally
Now type this
mbr2gpt.exe /convert /disk:1 /allowFullOS
Let it finish and show result
Ok
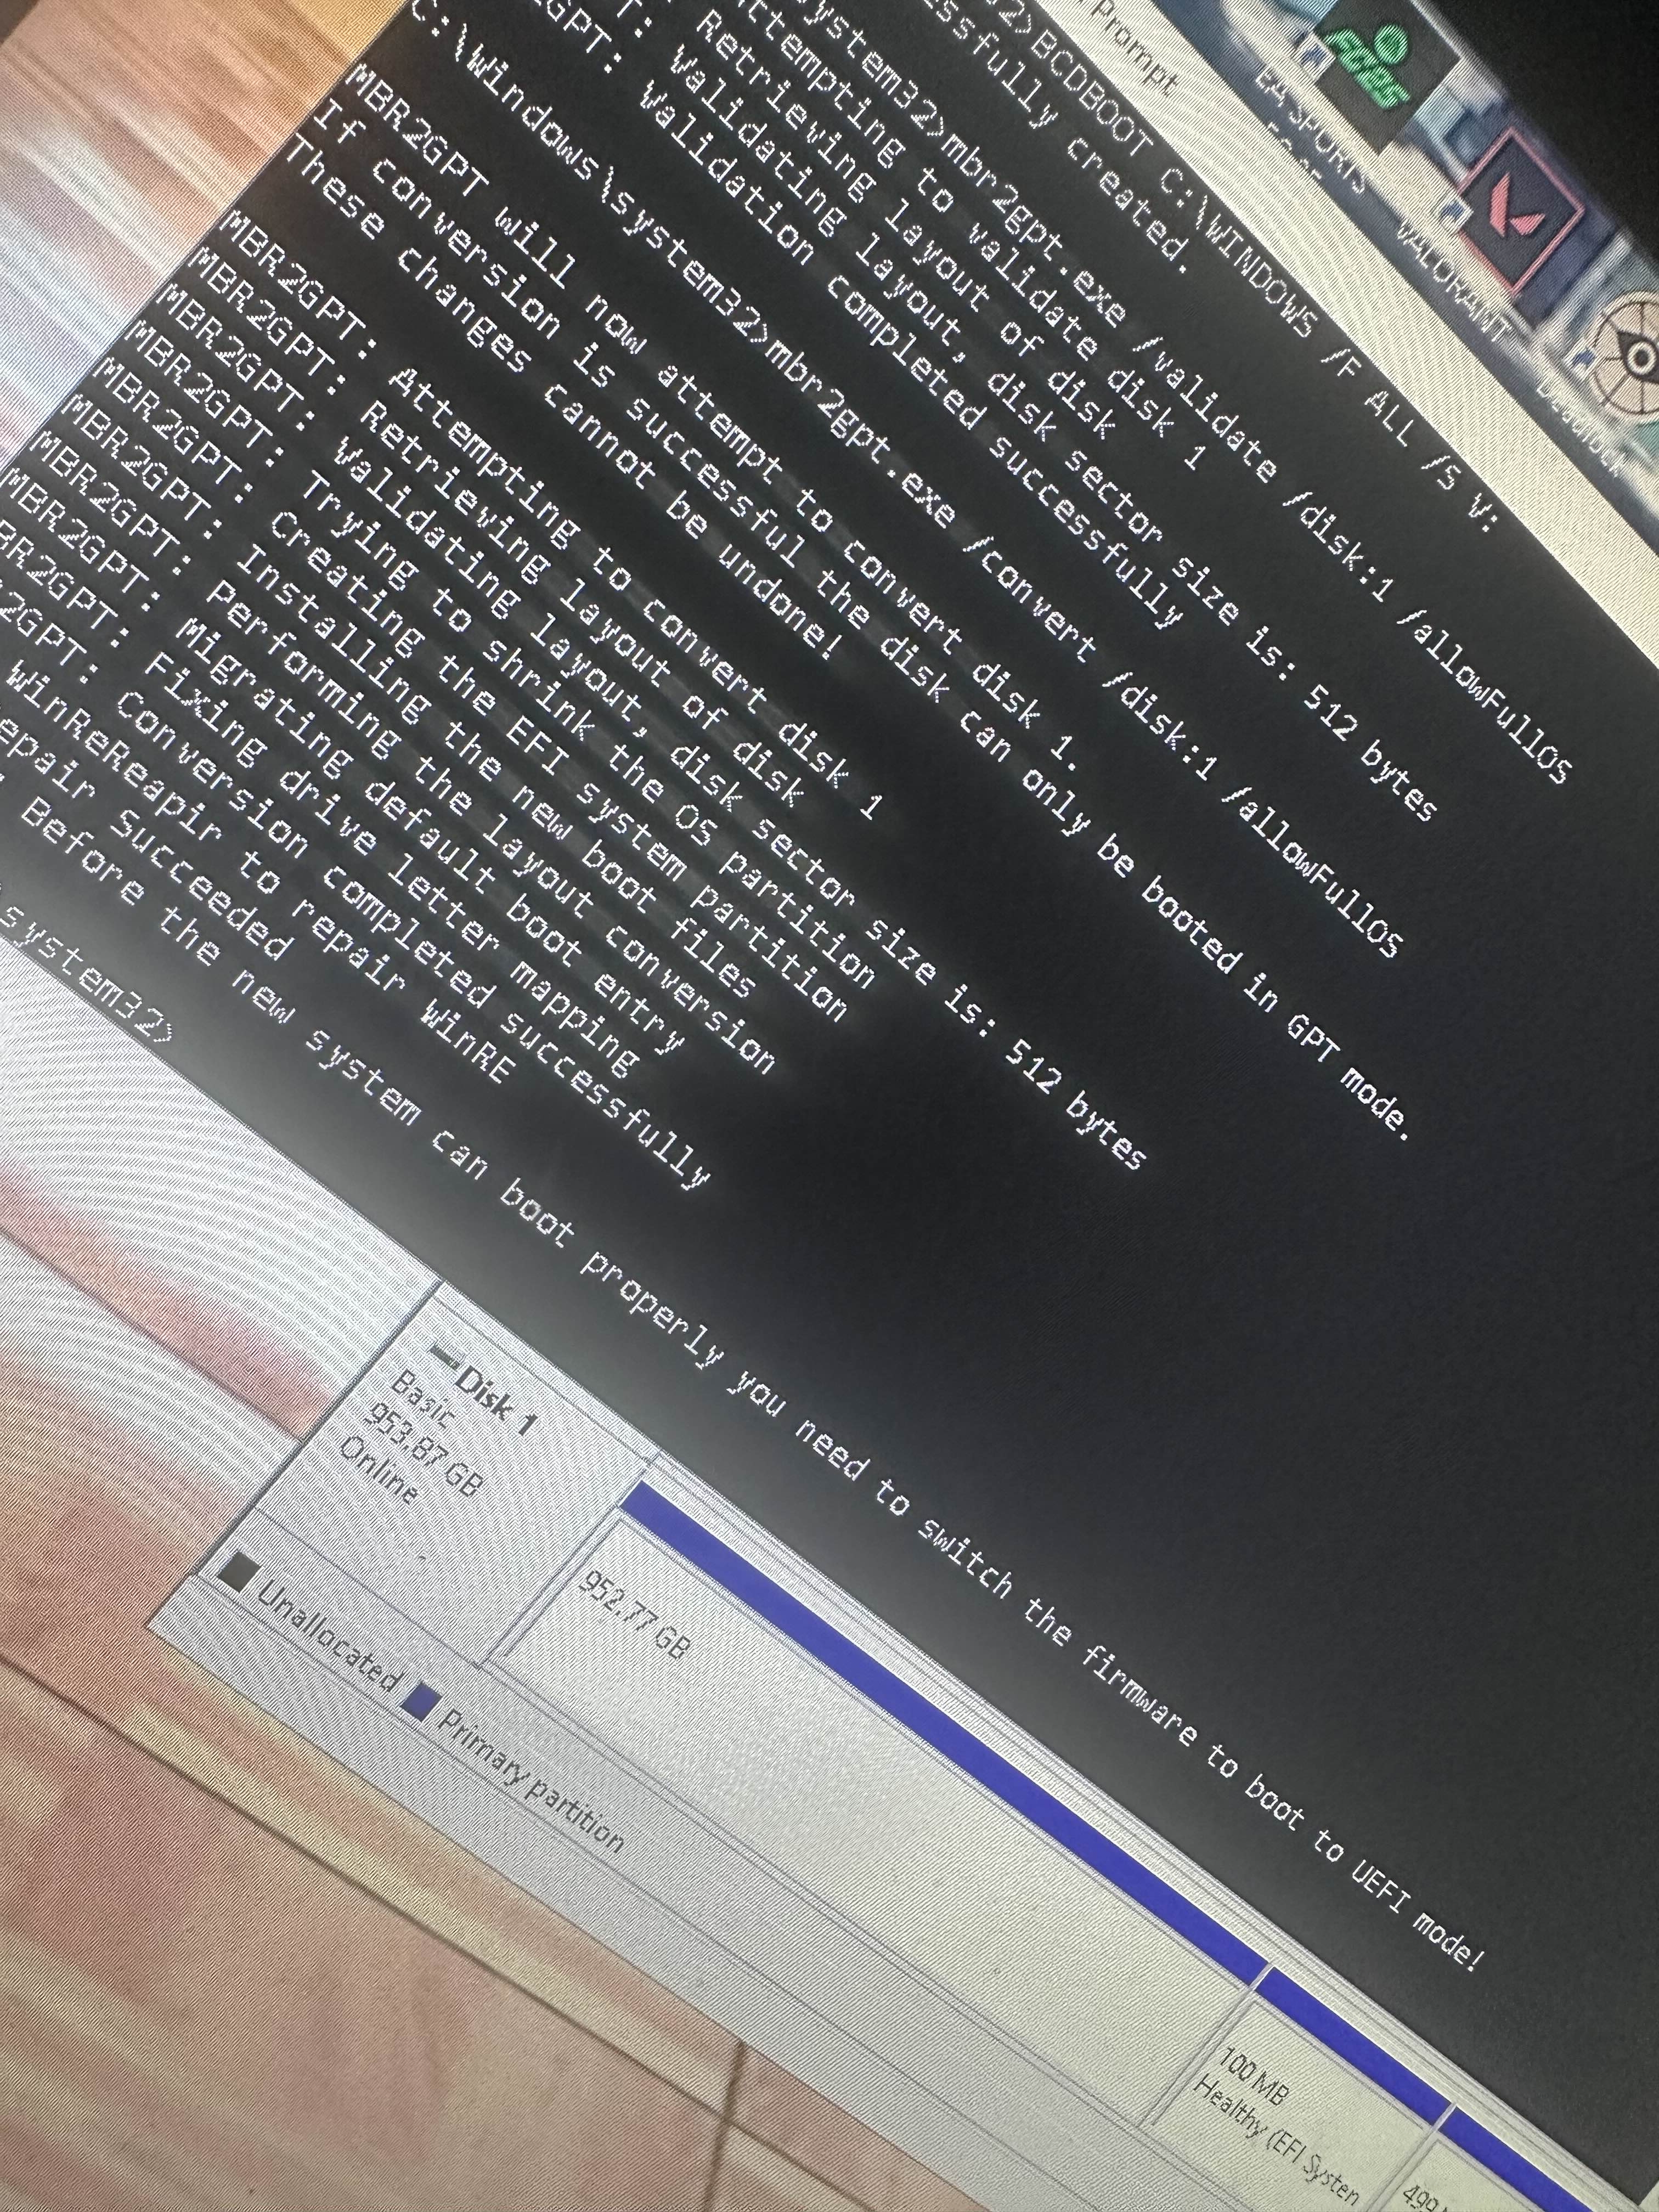
Good
Close everything
Get into the bios
Use ur phone to chat here
Once in bios, go to boot then CSM
Ok
Disable csm
Show photo
do i disable them save exit
No
Show photo inside csm first
Ok
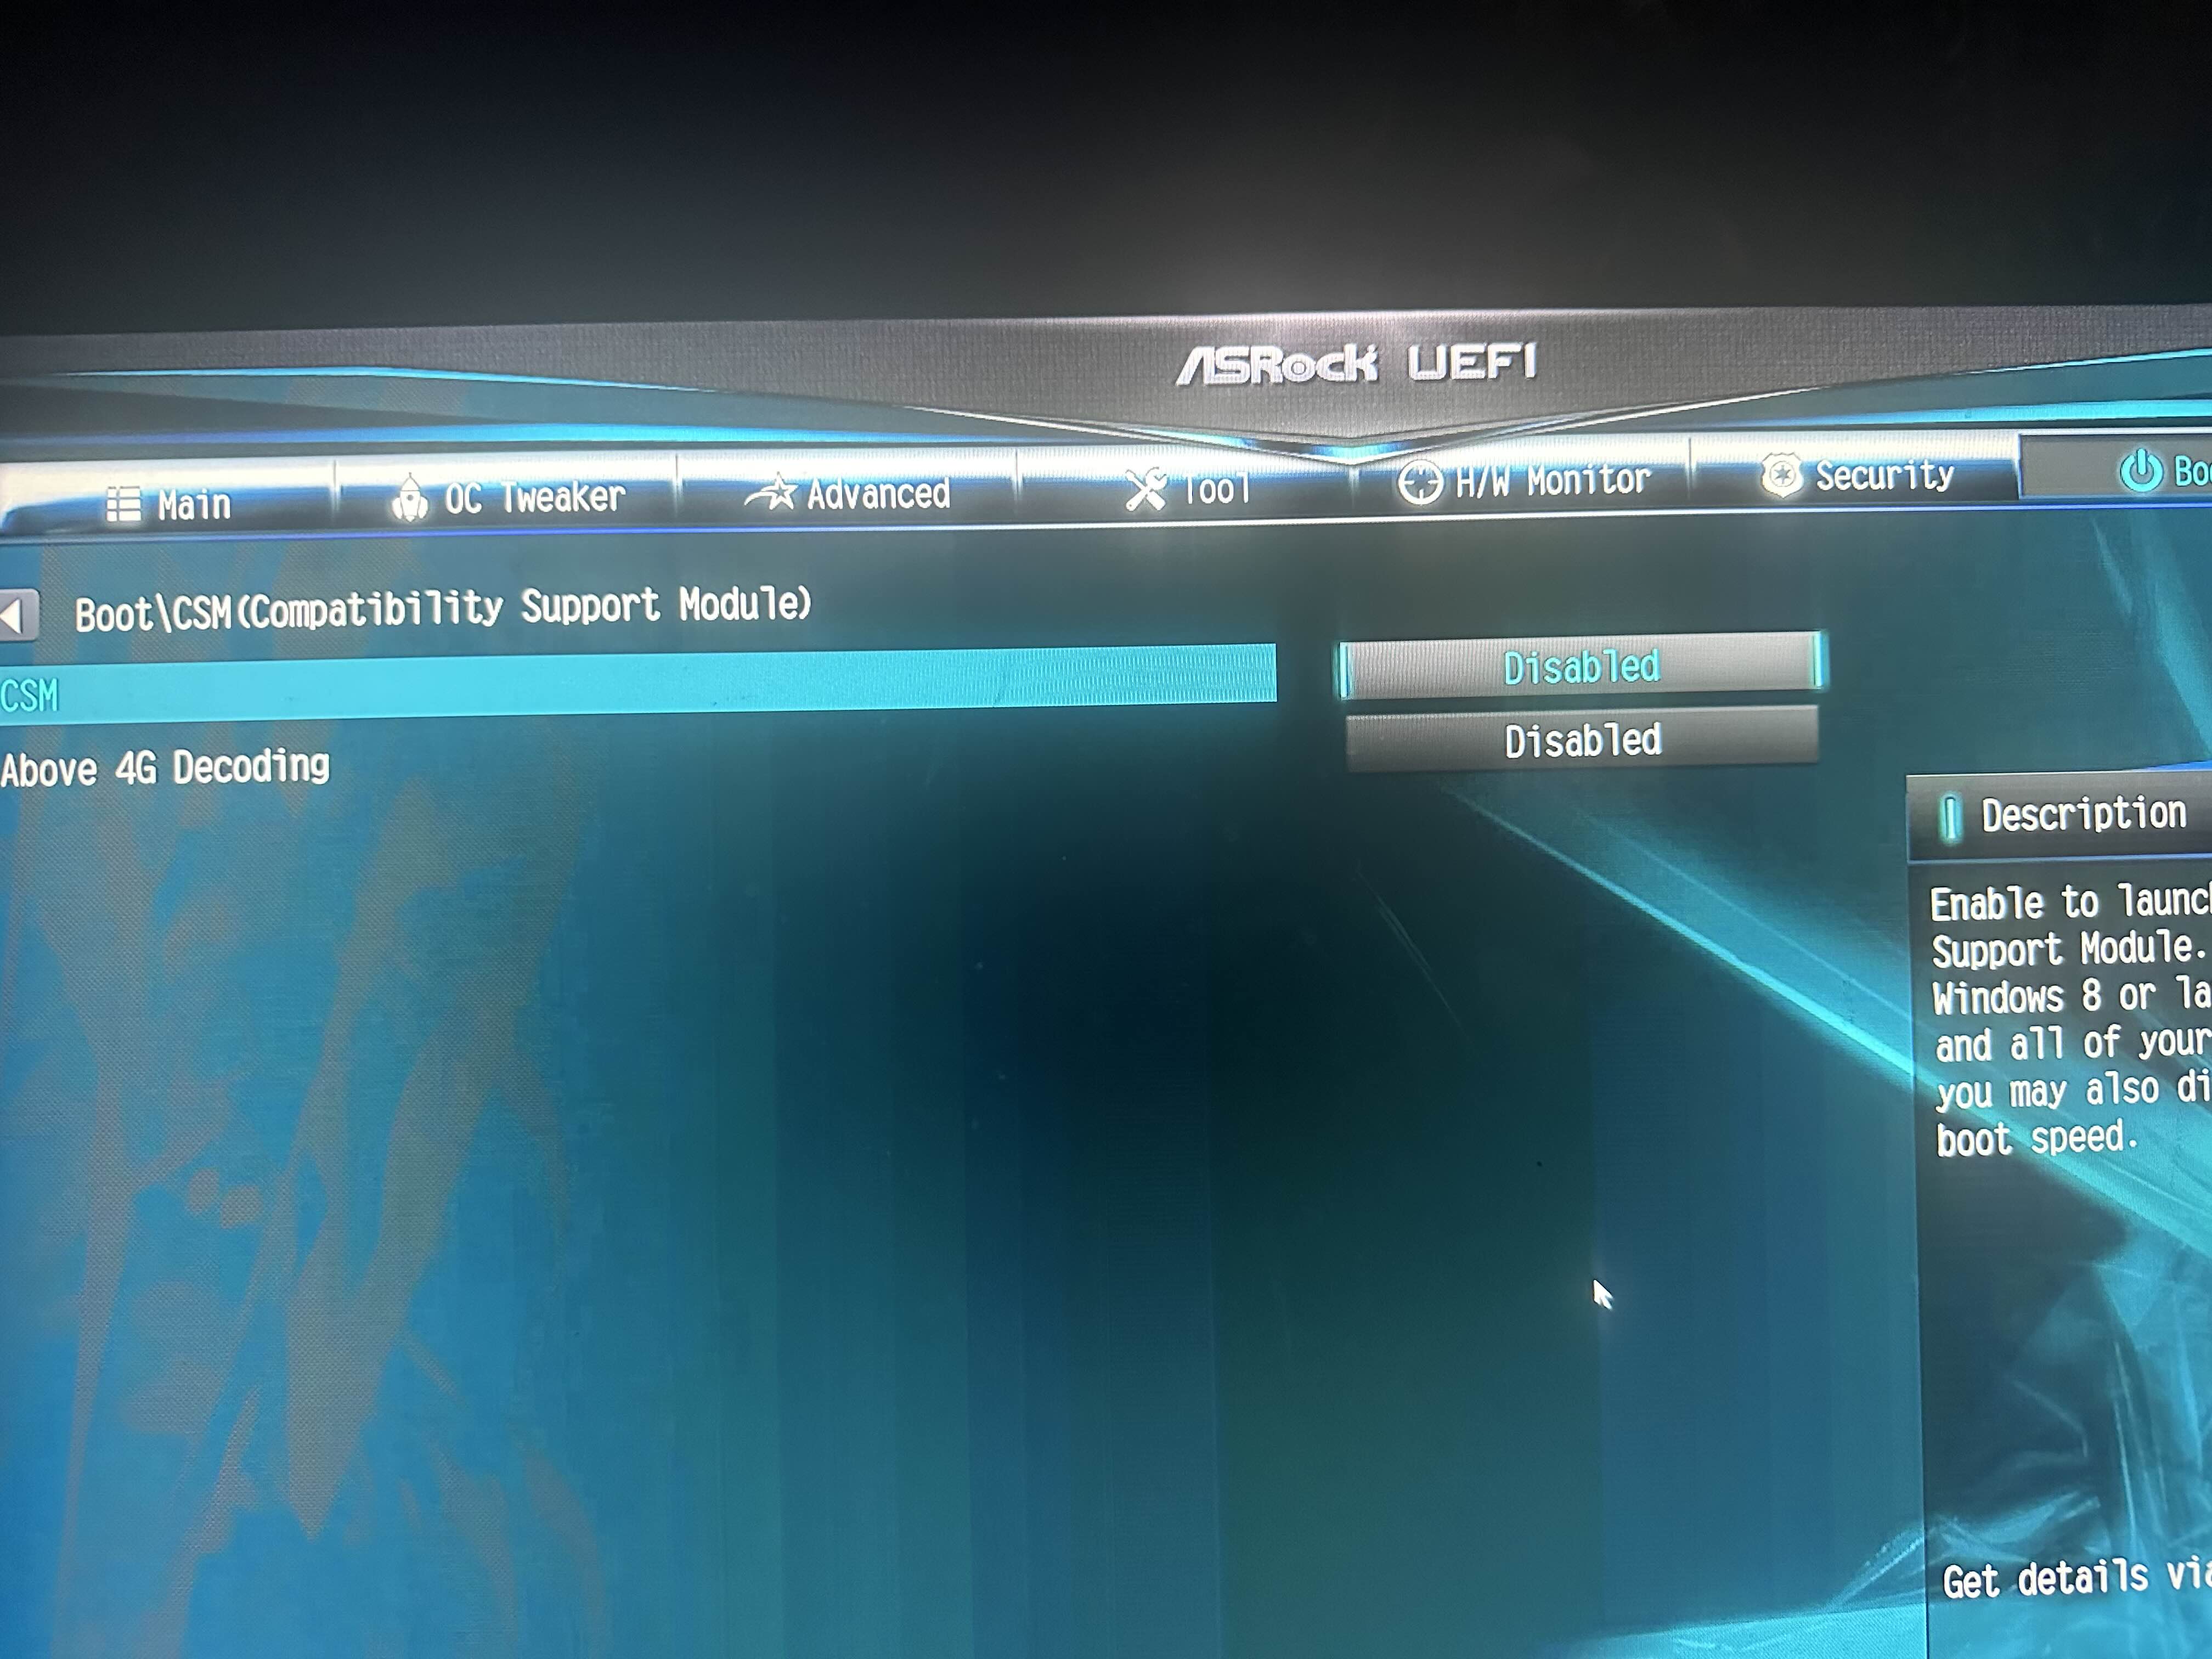
Go to security
Then secure boot
Show photo
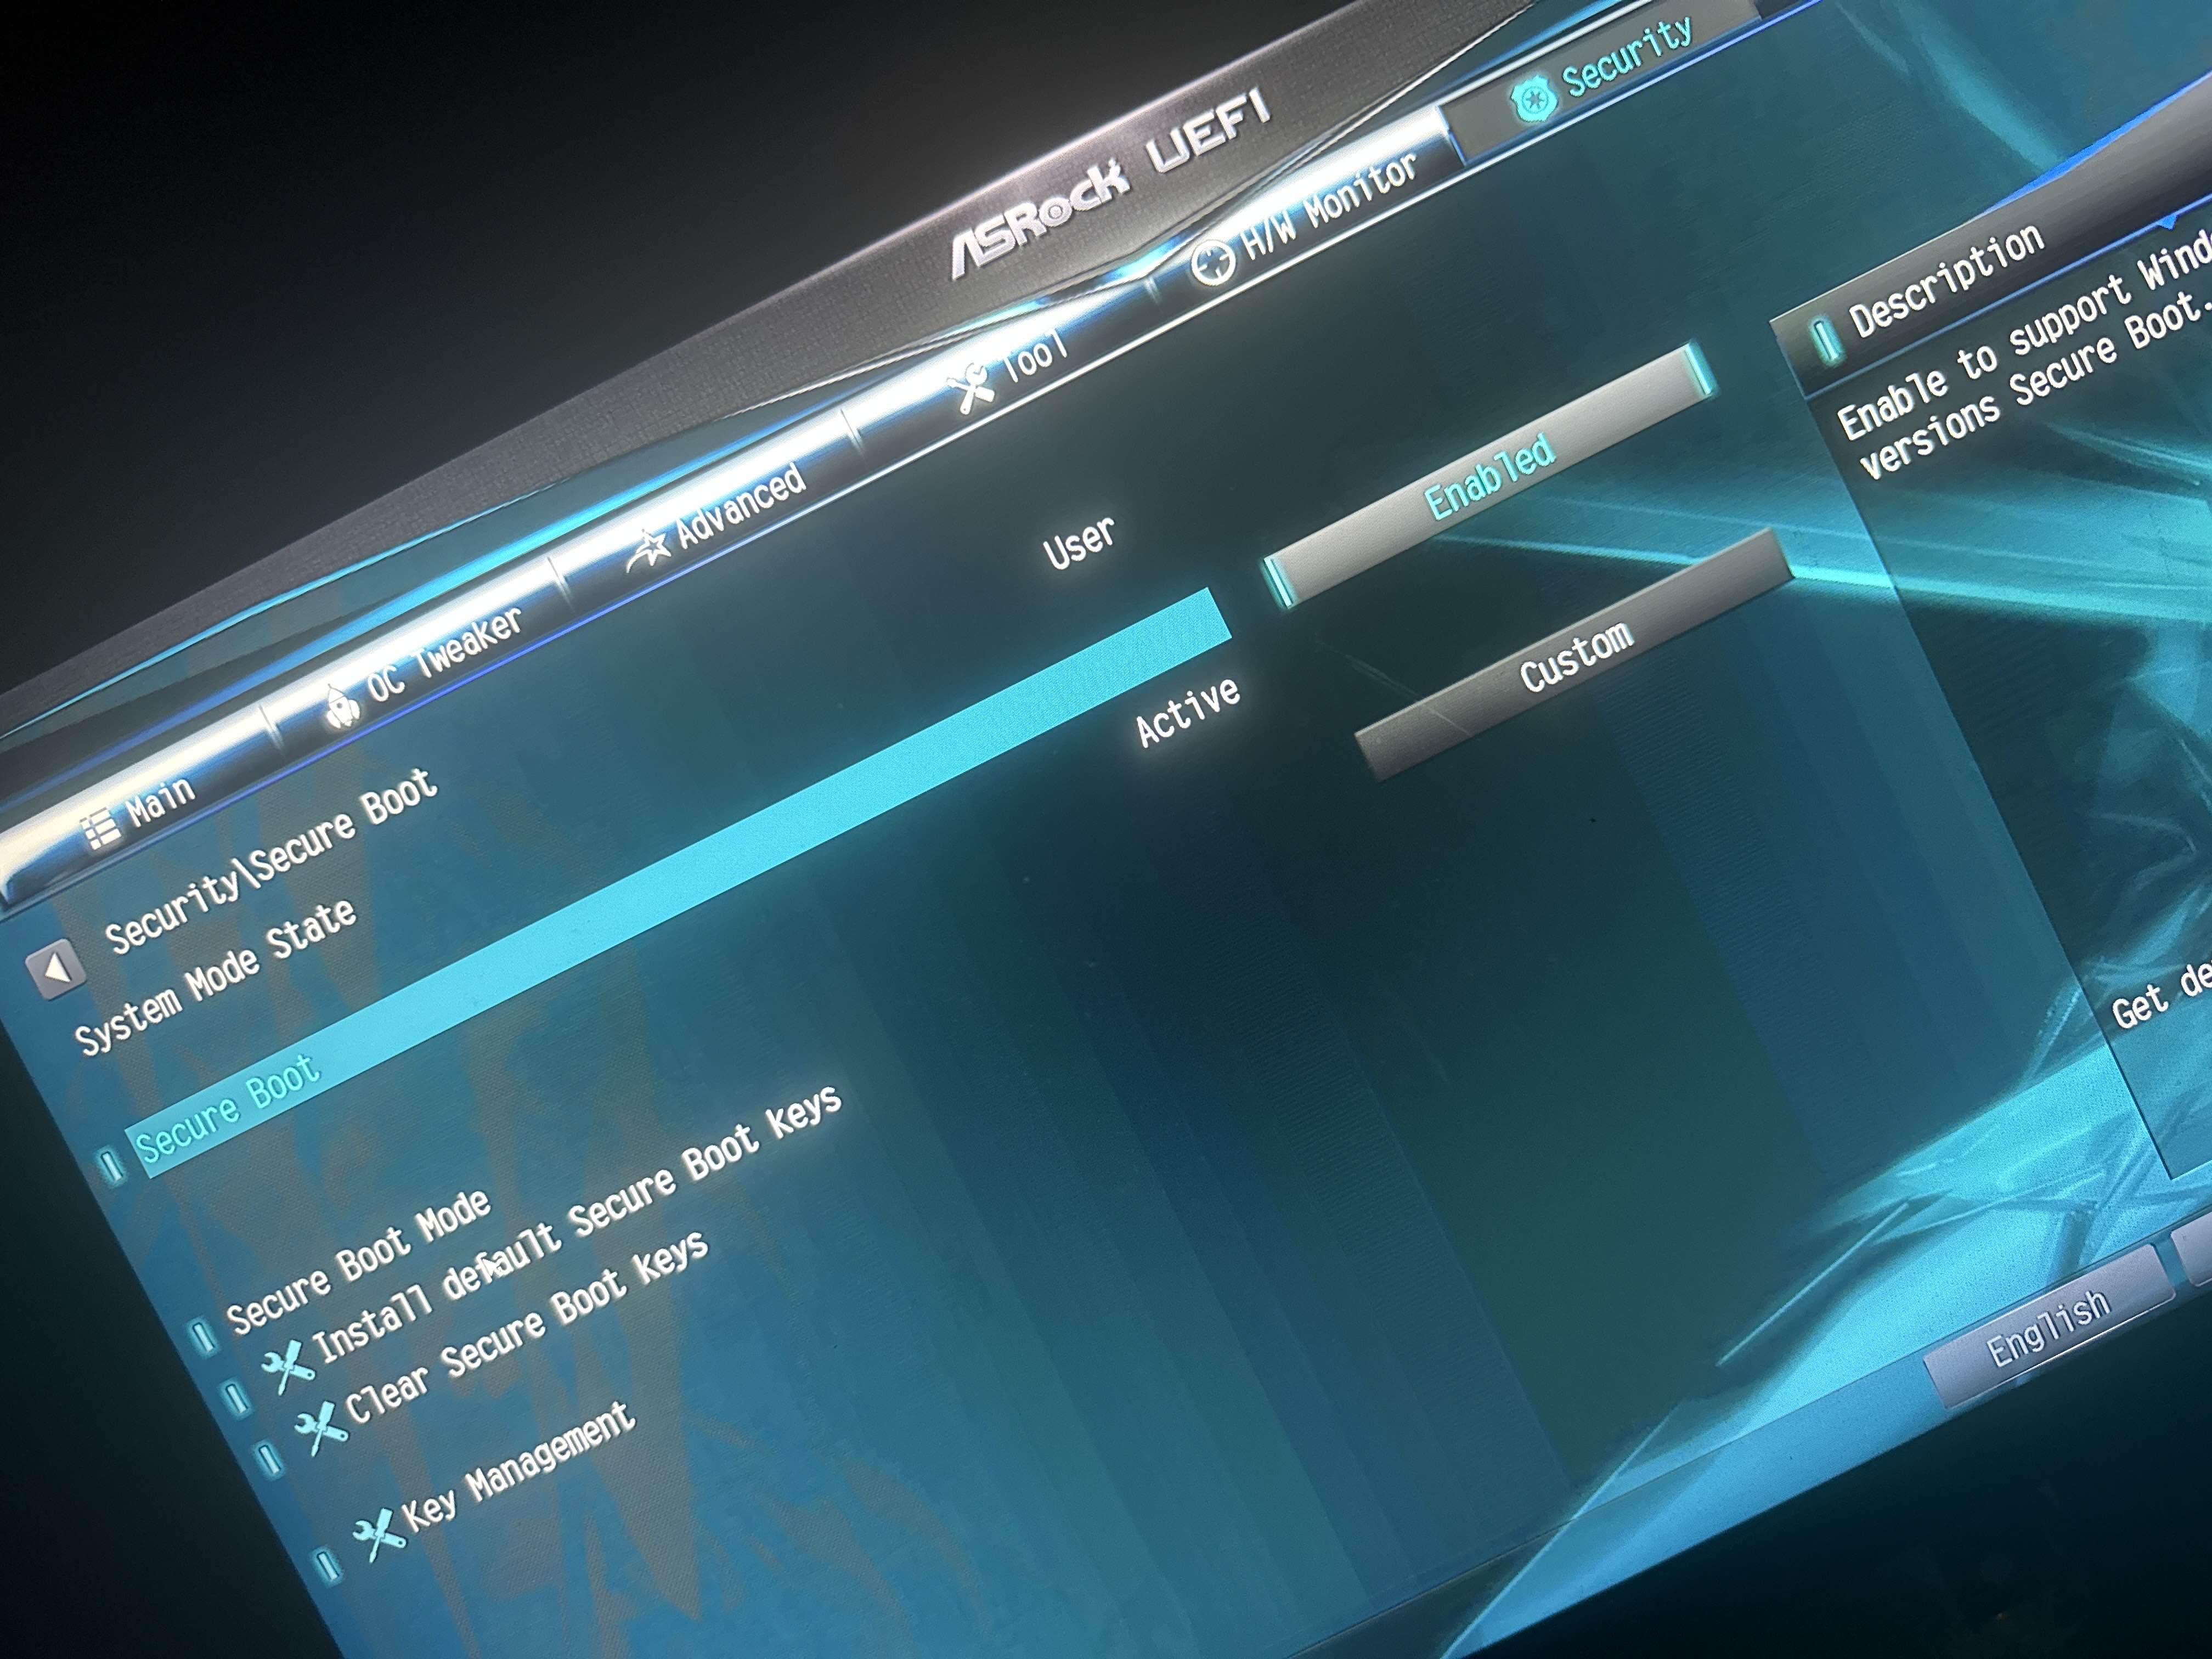
Key management
Show photo
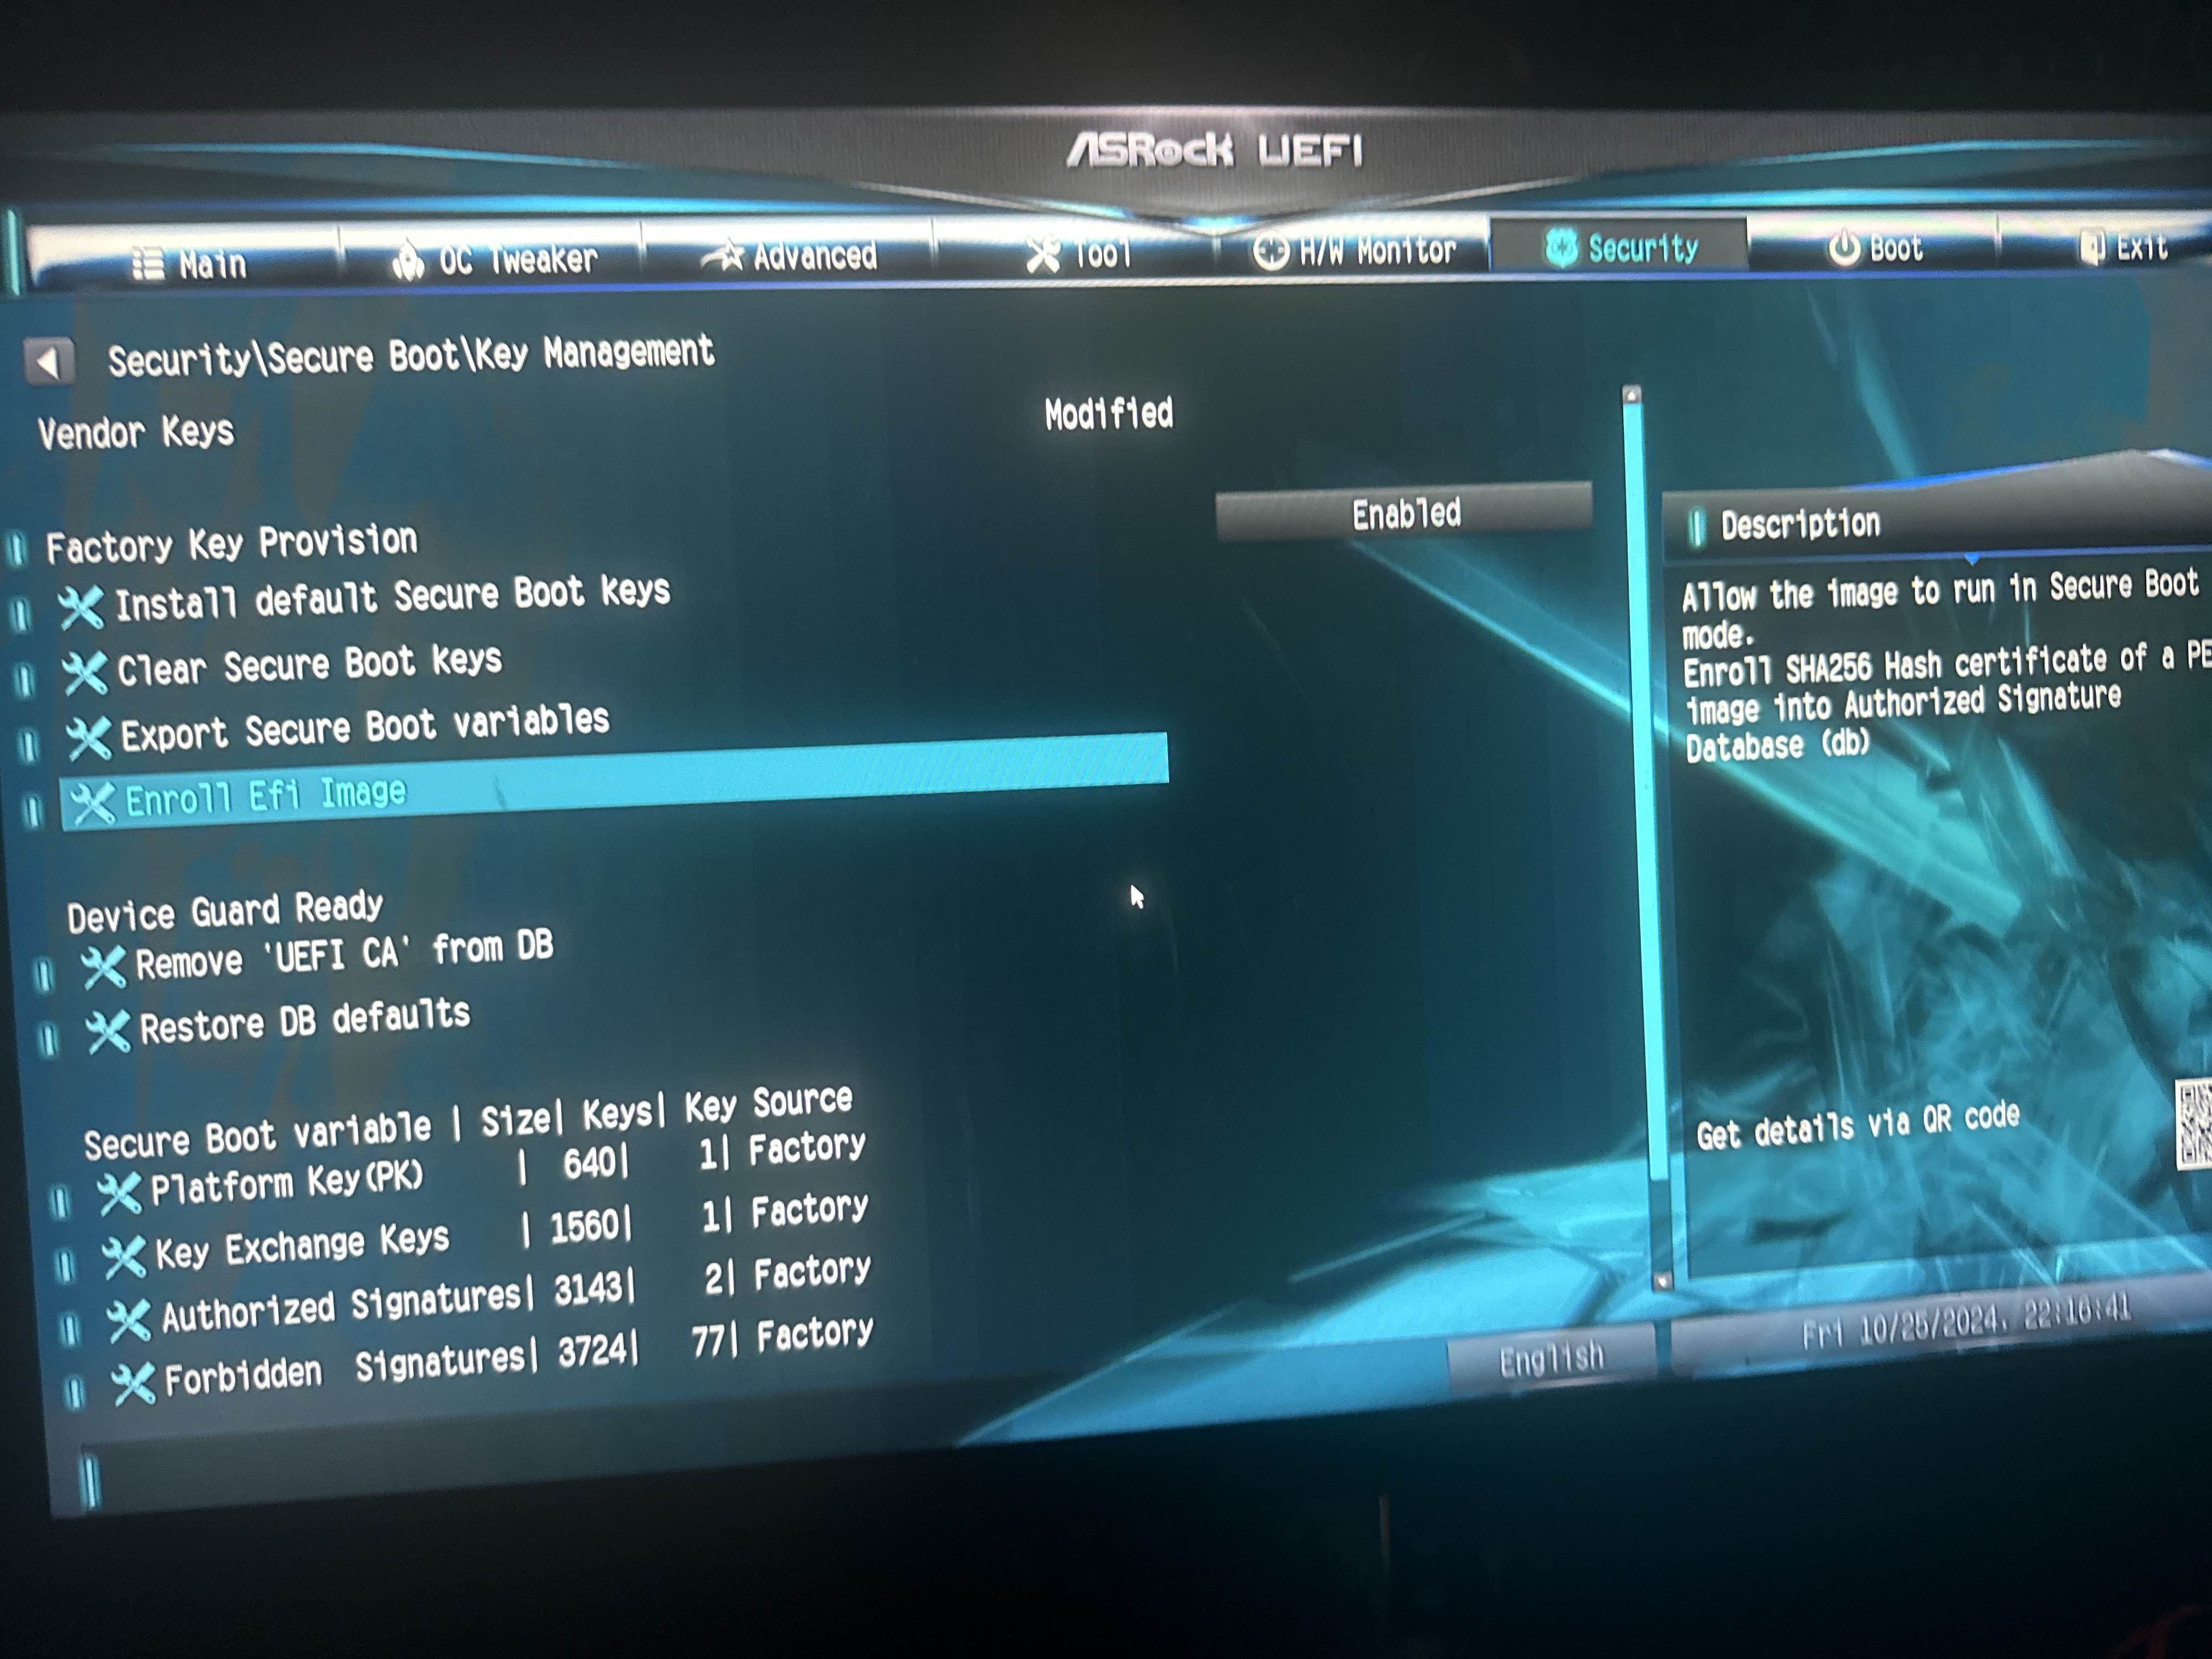
Save and exit the bios
Yes
Once in windows
Press win+r
Type msinfo32
Show photo
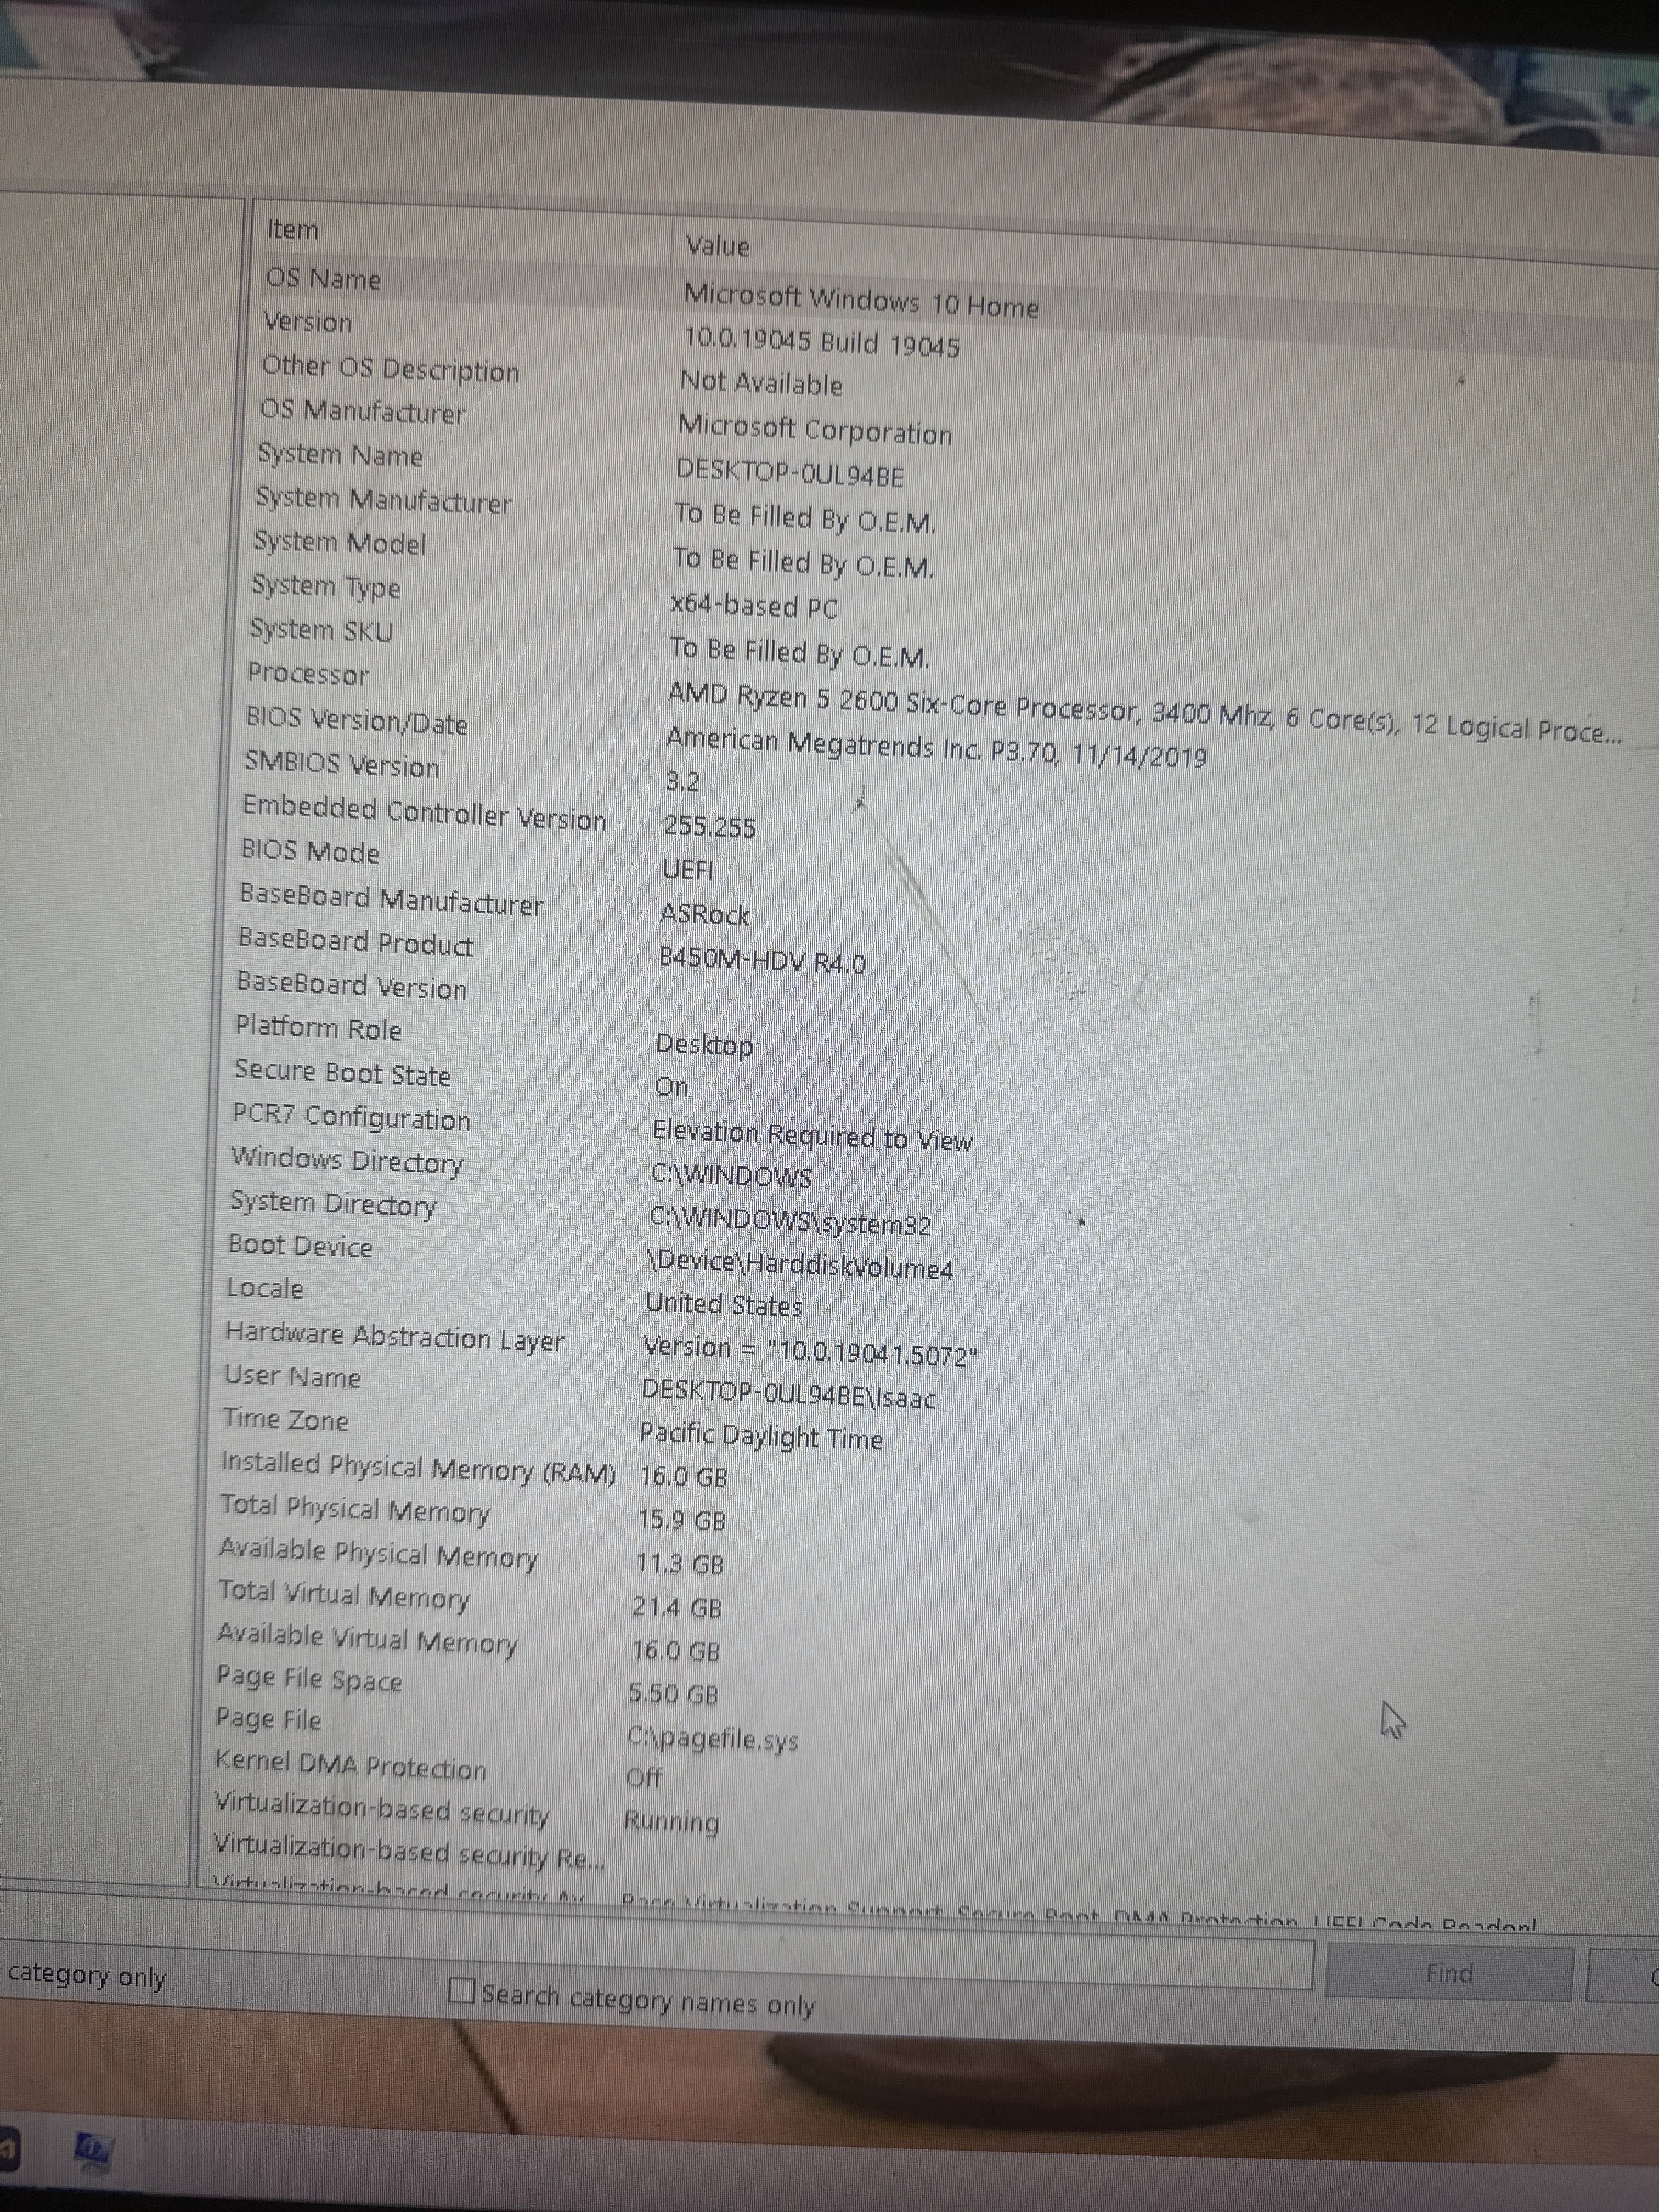
Looks like yes
UEFI on
Secure on
Should be good now
yea I don’t have WiFi rn so ill check tmr
But thank you for your help bro
🫡🙏
Np
Solution
Solution:- change disk partition to GPT, change bios mode to UEFI, then enable secure boot from the bios.
Any idea why this may have happened
I never ran into this problem before
Happened right after new patch
The secure boot restriction is imposed on the basis of trust factor of an account and some other things
interesting
HOW DID U SOLVE HVCI
Memory integrity on
in core isolations
@jidat nice job handeling that

tried opening today after last night
got this now
fixed it
reinstalled vanguard
🫡 ty